Screen Capturing with VEGAS Capture
To capture the video from any window on your computer, use the integrated VEGAS Capture program.
Open VEGAS Capture
-
Choose File menu | VEGAS Capture or,
-
in the Project Media window, chose Screen Capture from the Import Media menu or,
-
click the VEGAS Capture button
 in the Project Media window toolbar.
Record screen capture
-
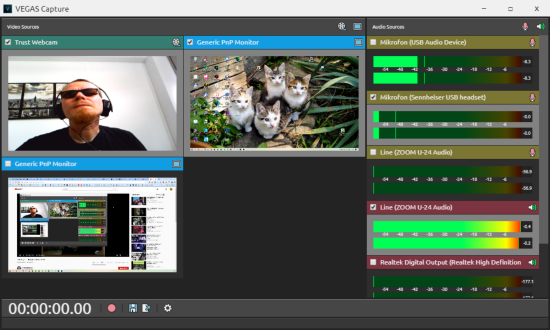
Video sources
On the left side all Video Sources are displayed as preview windows. All connected monitors and cameras can be used as capture sources.
-
Use the checkboxes in the upper left corner of the preview monitors to select the sources you actually want to capture.
-
Hide the respective category with the camera
 or the monitor
  button.
-
-
Audio sources
On the right side, choose one or more Audio Sources. You can capture from each audio playback and recording device.
-
Hide and show these source types with the mic
 and the speaker
  button.
-
-
Click the
record button to start the recording. The record button turns into a stop button and every selected source is now captured. -
To finish the recording, click the
 stop button.
Save screen capture
Click the  save button to save the media as a VEGAS Capture project (*.vegcap file).
This is a special project file that refers to all captured audio and video data and you can load it in later VEGAS Pro sessions.
Import screen capture
If you are happy with your recording, you can click the  import button to add the recorded video and audio to your project.
When inserting the media into the project, a new track is created for each video and audio source.
Settings
Click the  settings button to configure the VEGAS Capture application:
|
Theme |
Choose from three designs to customize the look of the program. |
|
Language |
Select the language of the program interface. |
|
Minimize to System Tray / Task Bar |
Choose, where to find the program once it's minimized. |
|
Save captured media to |
Specify the folder where the captured media is stored on your hard disk. |