Color Wheels
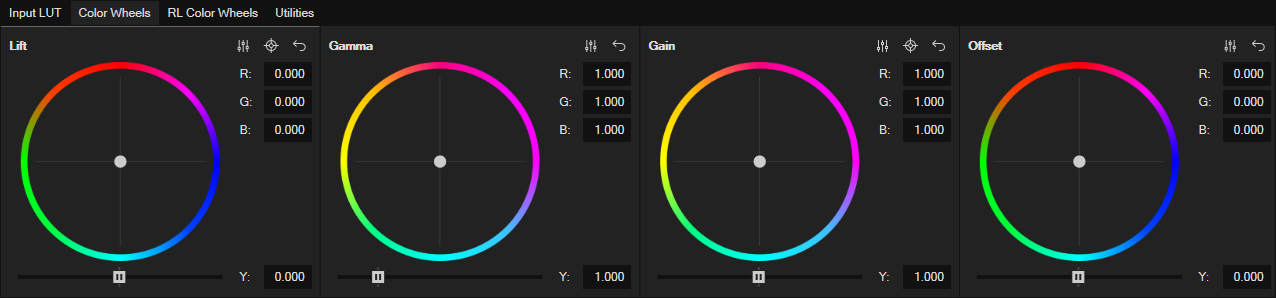
Click the Color Wheels tab to access the four color Wheels.
-
Adjust the thumb for each wheel to adjust the color of your video.
-
Double-click thumbs and sliders to reset them to their default values
-
Click the Reset button to reset a wheel to its default
Specify White and Black Points
The Specify White Point and Specify Black Point tools enable you to quickly analyze and correct the white and black values of your footage. This helps reduce the amount of time it takes you to color correct and grade your footage.
|
|
-
Click the Color Grading
 button to open the Color Grading Panel.
 -
Click the Color Wheels tab if necessary to make the color wheel controls visible.
-
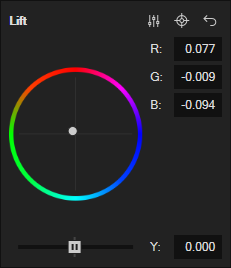
To specify the black point in your video:
-
Click the Specify a Black Point
 button for the Lift color wheel.
 -
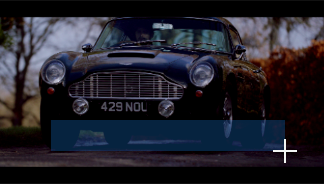
Point the crosshair mouse icon to a point in your Video Preview window that you want to identify as true black, and click that point.
This samples the color and automatically adjusts the Lift color wheel as necessary to make the point true black.
-
-
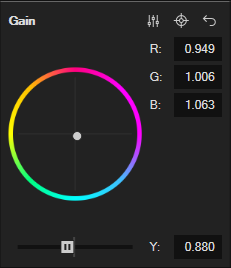
To specify the white point in your video:
-
Click the Specify a White Point
button for the Gain color wheel. -
Point the crosshair mouse icon to something in your Video Preview window image which should be white, and click that point.
This samples the color at that point and automatically adjusts the Gaincolor wheel as necessary to make the point true white.
-
After you set the black and white points of your footage, the brightness and contrast levels will be much closer to properly color corrected. This provides a great starting point for you to use to further correct and grade your footage.
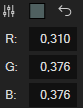
Preview of selected colors
It sometimes helps to know the exact color value of a point in your video. You can use the color pickers associated with the Set White/Black Point tools in the Color Grading panel to view color values.
-
Click the Color Grading
button to open the Color Grading Panel. -
Select an event in your timeline to place the cursor within it so you can view its video in the Video Preview window.
-
Click the Color Wheels tab if necessary to make the color wheel controls visible.
- Click either the Specify a Black Point or Specify a white Point button.
-
Point (not click) your mouse to a spot in your Video Preview window.

-
Back in the Color Grading panel, notice that a color square appears and shows you the colors you point to as you move your mouse.
The R, G, and B fields show you the value of the color your mouse currently points to.
Region option when selecting a color
When you use the Specify a Black Point and Specify a White Point buttons in the Color Grading panel, you can specify an area from which to specify an average color. This can sometimes give you more accurate color correction than the value of a single pixel can provide.
-
Click the Color Grading
button to open the Color Grading Panel. -
Select an event in your timeline to place the cursor within it so you can view its video in the Video Preview window.
-
Click the Color Wheels tab if necessary to make the color wheel controls visible.
- Click either the Specify a Black Point or Specify a white Point button.
-
Point your mouse to a spot in your Video Preview window.
-
Click and drag through your video to create a sample area rectangle. Once you have the rectangle you want, release your mouse button. If you just click at this point, you will sample a single pixel and your automatic color adjustments will be based on the color value of that pixel.
VEGAS then samples the entire area you defined and calculates an average of all of the color values within that area. The tool uses this average to then make the automatic color adjustments.
Range-Limited Color Wheels
The Range-Limited Color Wheels enable you to define a specific range of colors that adjustments to the various color wheels affect.
To access the Range-Limited Color Wheels, click the RL Color Wheels tab in the VEGAS Pro Color Grading Panel.
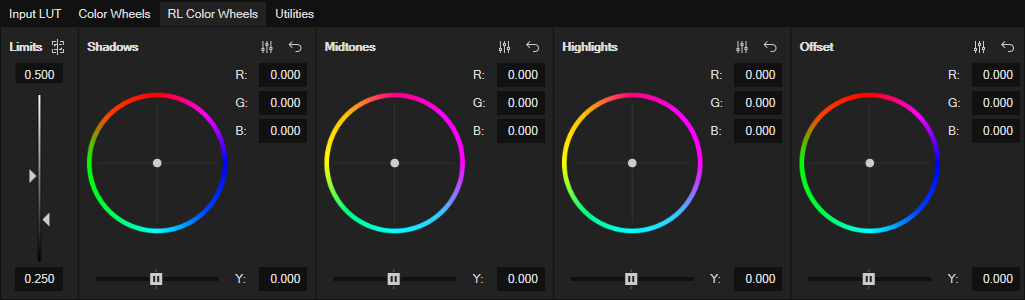
If one of them is not already visible, open the Waveform or RGB Parade video scope. Notice the light blue lines in the scope. These identify the thresholds that limit the color adjustments you make with the RL Color Wheels. Back in the Color Grading panel, use the Show Limits on Scopes button to toggle these indicators off and on.
Adjust the Left Limit slider to change the value of the upper threshold and watch your video scope to see where you’re placing the threshold. Use the Right Limit slider to adjust the lower threshold.
With the thresholds set, make an adjustment to the Shadows color wheel. Notice that the lower threshold setting limits the Shadows color wheel so that changes you make with it affect mainly the material below the low threshold.
Make adjustments to the Highlights color wheel. In the same way, the upper threshold limits these changes to mainly material that rises above the threshold.
Finally, make adjustments to the Midtones color wheel. These adjustments apply mainly to material that exists between the two threshold settings.
Fine mouse movements for the Color Grading Panel
In any of the color wheels (or on the color channel sliders), use your Left mouse button to move the control.
For even finer movement, hold the Ctrl key. Use this technique for extreme accuracy.
If you prefer making large changes quickly, use the Right mouse button to move the control. This matches the speed used by default in previous versions of the software.