GL Transitions
The GL Transitions project is an open-source development initiative that aims to establish a universal collection of transitions. The implementation of GL Transitions into VEGAS Pro opens a world of possibilities for modern transition types. You can simply apply these transitions as presets inside VEGAS Pro, or you can customize transitions and even create completely new ones of your own.

How to add one of around 50 existing GL Transition presents:
-
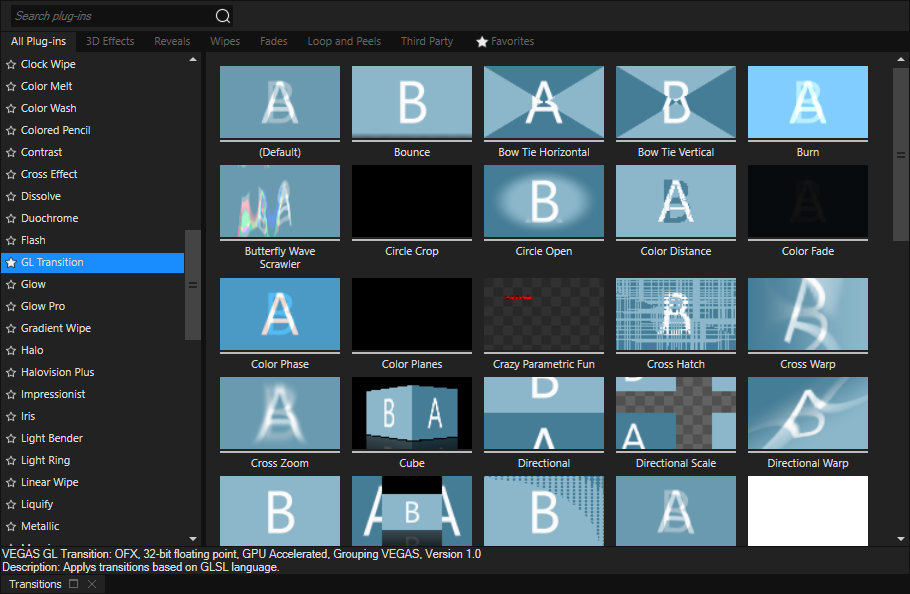
Click the Transitions tab in the window docking area to bring that window forward.
-
Select GL Transition from the list of transitions on the left.
-
Hover over the various presets on the right to preview them and find the one you want.
-
To apply a transition preset to your project, drag the preset from the Transitions window onto a crossfade between two timeline clip events.
-
The different transitions have unique parameters and controls. Adjust the controls to customize the transition you’ve added.
How to create a new or customized GL Transition
-
Add the Default preset to your timeline.
-
Enter or paste the code for your custom transition (the code must be written in GLSL) into the code window.
TIP To learn more about the GL Transitions project, visit the GL Transitions website.
Unfortunately, in the initial release of this feature, some users will experience problems including an “Invalid Shader” message. This is related to CPU usage and some Nvidia Gfx graphics cards that don’t support OpenCL/OpenGLinterops.
If you experience these problems, you can work around them with this procedure:
- Right-click the crossfade on your timeline.
- Choose Transition Properties from the context menu.
- Use the Plug-in-Chooser to add the GL Transitions.
- Select the preset you want from the Preset drop-down list in the Video Event FX window.