Color Correction
The Color Corrector plug-in helps you adjust colors in your video by independently adjusting the color of low, middle, and high color tones.
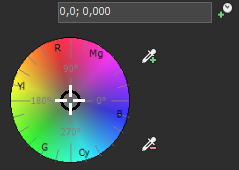
The point's angle determines the hue you are adding, and the distance from the center determines the magnitude, or saturation of that hue.
-
Position your cursor on the frame you want to adjust in the Vegas timeline.
TIP Working with the Scopes window open will help you monitor your progress.
-
Click the arrow
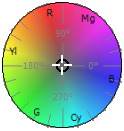
 to show or hide the color wheel for the color range to be adjusted (Low, Medium, High):
-
Drag the point in the center of the color wheel to pick a hue and saturation.
-
Enter appropriate values in the format (angle, magnitude) into the edit box to define a hue and saturation.
-
Use the complementary color eyedropper tool
 and sample a color on your screen to add the sampled color's complement. For example, if the blacks in your video contain a blue cast, you use the complementary color eyedropper from the Low color wheel to sample a black portion of your video. Adding blue's complement will rebalance your blacks.
Complementary colors are colors that are 180 degrees apart on the color wheel. In the following image, you can see that red and cyan are complementary colors, as are magenta and green, and blue and yellow.
-
Use the adjustment color eyedropper tool
 to sample a color on your screen to choose the color you want to add.
-
-
Drag the Saturation slider to adjust the video's overall saturation.
-
Drag the Gamma slider to adjust the overall brightness of the video. 1 is the default setting; higher settings produce a brighter image, and lower settings produce a darker image.
-
Drag the Gain slider to add a gain to all luminance values in the video. All luminance values are multiplied by the Gain setting.
-
Drag the Offset slider to offset all luminance values in the video.