Credit Roll
Use Credit Roll to add credits to your video project. Enter the text you want to display in the Credits Text area, and use the Properties and Styles tabs to adjust the appearance of the text.
TIP To display text over a video event, place the generated media event on a track above the video.
The Credit Roll toolbar
Use the Credit Roll toolbar to add and delete rows, import text and properties, and export text and properties.
|
Button |
Description |
|---|---|
|
|
Insert a row in the Credits Text pane. |
|
|
Delete one or more selected rows. |
|
|
Import credit roll text from a .txt file. If you've selected rows of text, the selected rows will be replaced with the imported text. If no text is selected, the imported text will be added to your credit roll. TIP
Tips for creating a text file:
|
|
|
Import credit roll text properties from a .xml file. |
|
|
Export credit roll text to a .txt file. |
|
|
Export credit roll text properties to an .xml file. |


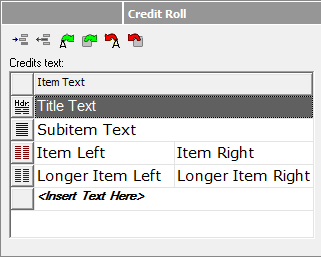
The Credits Text pane
Click within the Item Text boxes to type the text you want to display.
To add a new item, click in the <Insert text here> box and start typing. A new row is created at the bottom of the credit roll.
TIP Click the Style Selection button and choose a setting to adjust the number of columns that are displayed.
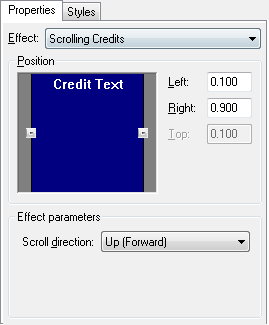
The Properties tab
Use the Properties tab to control the appearance and placement of your credits in your project.
|
Item |
Description |
|---|---|
|
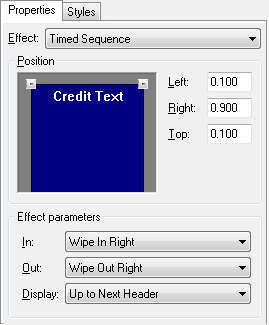
Effect |
Choose Scrolling Credits to create text that scrolls evenly across the screen. Choose Timed Sequence to create a series of text items that remain on screen for a period of time. |
|
Position |
Drag the yellow boxes or enter values in the Left, Right, and Top boxes to adjust the position of your credit text on screen. |
|
Effect Parameters |
Choose settings from the drop-down lists to specify how your text appears on screen. If you're using Scrolling Credits, you can make your text scroll from bottom to top or from top to bottom). If you're using Timed Sequence, you can use the In and Out drop-down lists to control how each text item appears and disappears. Use the Display drop-down list to control how many text entries are displayed at once. |
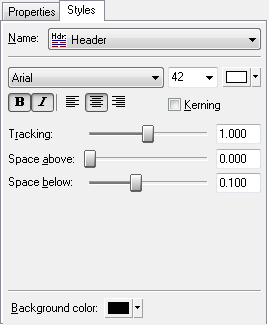
The Styles tab
Select an item in the Credits Text pane and use the Styles tab to control the appearance and placement of the selected text.
|
Item |
Description |
|---|---|
|
Name |
Choose a setting from the drop-down list to control the number of columns that are displayed. This setting has the same effect as clicking the Style Selection button |
|
Font Settings |
Use these controls to adjust the typeface, size, color, bold/italic properties for the selected text style. |
|
Snapping |
Click a button to left-align, center, or right-align the selected text style. |
|
Kerning |
Select this checkbox to automatically adjust the spacing between characters. |
|
Tracking |
Drag the slider to adjust the amount of space between characters. |
|
Space above |
Drag the slider to adjust the amount of space above the selected text style. |
|
Space Below |
Drag the slider to adjust the amount of space below the selected text style. |
|
Center width: |
Drag the slider to adjust the space between the right and left columns of credit text. NOTE This control is displayed only when the Style Selection button is set to display two columns. |
|
Background Colour |
Click to choose the color of the background. If you choose a solid color, the video below your credits will be obscured. If you choose a transparent color, your credits will be displayed over the video. |