Animate OFX keyframes on the timeline
Timeline-based OFX keyframe animation lets you create and adjust envelopes for event and track effects (OFX) directly in the timeline. This allows you to animate video effect parameters with the same intuitive precision you already know from automating volume or pan. By working directly within the timeline, you maintain full visual context and avoid unnecessary UI switching.
-
Work in full visual context: see the result while you place and adjust keyframes on the timeline.
-
Synchronize parameter changes precisely to frames, cuts, and beats.
-
Coordinate multiple parameters of one effect so they change together over time.
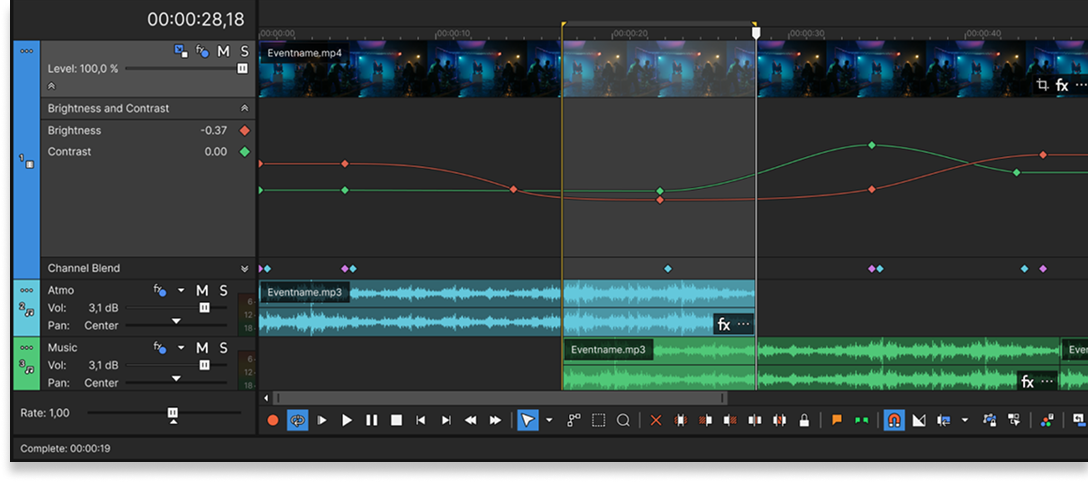
FIGURE Timeline-based envelope animation
Create keyframes on the timeline
Verify that View | Show OFX Effect Envelopes (Beta) is enabled so OFX envelopes appear on the timeline (disabled by default).
-
Decide where you want the animation to apply:
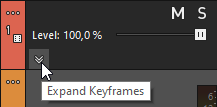
1Track level The effect applies to all events on the track and its envelope spans the entire track. 2Event level The effect applies to this clip only and its envelope appears within the clip. 
FIGURE Timeline envelopes. 1 Track-level envelopes span the entire track. 2 Event-level envelopes appear only within the clip.
-
In the Video FX window, drag the effect to either the event (event level) or the track header (track level).
-
In the effect UI, click
 Animate next to each parameter you want to animate.
If you used a preset, an initial keyframe (point) is typically created at the start with the preset value.
-
On the timeline, click Expand Track Keyframes in the track header.
-
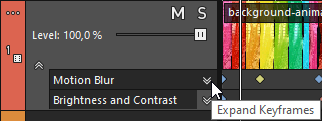
Click the effect’s Expand Keyframes button for your selected effect to show the parameter envelopes.
-
Add more keyframes where needed:
-
Double-click the envelope, or:
-
Right-click the envelope and choose Add Point.
-
-
Adjust values and curves: drag keyframes, or right-click a keyframe to enter an exact value or choose a curve type.
 For more information, see Adjust values and curves
 -
Play the project to preview the result.
Adjust values and curves
To adjust values and curves directly on the timeline, use the context menu. Where you right-click determines the scope of the command:
-
Keyframe area (blank lane background): actions for all visible envelopes or to show/hide envelopes.
-
Target envelope (the line): actions for this specific parameter’s envelope.
-
Keyframe (the node/point): actions for the selected keyframe only.
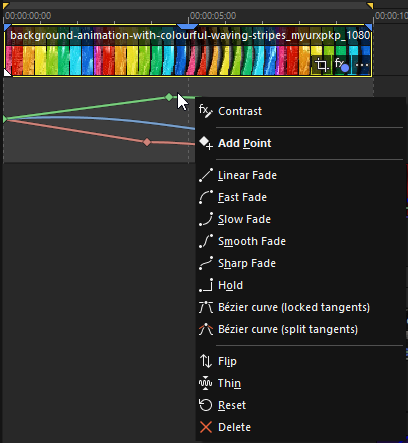
FIGURE Timeline envelope context menu for editing keyframes and curves
Add keyframes:
- On a single envelope: right-click the target envelope ► Add Point (inserts a keyframe (point) at the cursor time).
- On all visible envelopes: right-click in the keyframe area ► Add Point.
Set exact values or choose a curve:
Right-click a keyframe to enter a numeric value or select a curve type (e.g., Linear, Ease, Slow, Smooth, Sharp, Hold, Bézier).
Utilities for the envelope shape:
Right-click the target envelope and choose Flip (invert around mid value) or Thin (reduce intermediate keyframes while preserving the overall shape).
Show/Hide and cleanup:
-
Right-click the keyframe area to show or hide parameter envelopes.
-
Use Reset to remove all keyframes for the current parameter (flat envelope), or:
-
Delete to remove the selected keyframe.
-
Use Undo if you remove keyframes by accident.
Only one plug-in’s animation controls are visible at a time. However, you can adjust the timing of collapsed envelopes without affecting their values.
Last modified on December 08, 2025