Stitching
Stitching describes the process of combining images from individual cameras or lenses to create one, large image and projecting the spherical image onto the rectangular surface of the video. While more advanced cameras can perform their own stitching or come with a dedicated stitching software, most simple cameras with only two lenses create a video which needs to be stitched together to create a true 360° video.
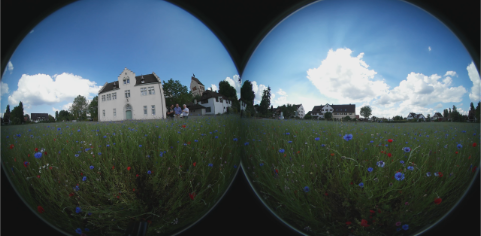
Unstitched video image from two 180° fish eye lenses on a 360° camera
These cameras often also include stitching software, but the more elegant solution is to perform stitching directly in VEGAS Pro. The stitching is performed by the video effect plug-in Dual-Fish-Eye-Stitching.
This is how it works:
-
Make sure, the 360° Preview mode is switched off (
 button in the Preview Window toolbar). Adjusting the view point in the preview does not work when an effect dialog is open and you will need to have a look at the whole video to adjust stitching.
 -
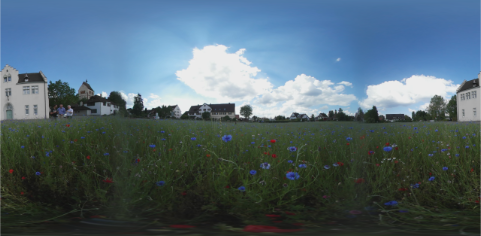
Apply the effect on the media or event level. The video preview will now look like this:

As you can see, some fine adjustment has to be made to get a perfect result:
-
Adjust the Field of view slider, until the picture merges seamlessly at the edges (1).
-
As a result of the fish-eye optics the light is quite low at the border of the picture of each lens which results in a visual vignette effect at these borders (2). Click on the triangle near Image Vignetting and adjust the Intensity and Range sliders to minimize the effect. For a comparison, you can switch off vignette removal by deactivation the Remove vignetting check box. You can additionally experiment with the parameters under Refinement for a perfect result, but in most cases this is not necessary. The image should now look like this:
-
Switch 360° preview mode on again and enjoy your panorama.

TIP You will find presets for several popular 360° cameras with two lenses. For other camera models, you can change the parameters below