Adjustment events
*new since VEGAS Pro 21*
Adjustment events provide a powerful tool for adding effects to your project in very flexible and creative ways. You can add an adjustment event to your project and apply effects to that event. Then, any video event in your timeline directly below the adjustment event will “inherit” the effect from the adjustment event. You can use this to easily bring effects in and out, create sophisticated custom transitions, and much more.
Adjustment events behave similarly to regular video events, but with some additional capabilities. Here are some techniques you can use with adjustment events:
-
Add fades in and out.
-
Change the opacity.
-
Create trim, split, and other edits.
-
Cut, copy, and paste adjustment events.
-
Use the Mute and Lock switches to control their behavior.
NOTE Certain functions, such as reversing or adding a Velocity envelope, do not apply to adjustment events.
Adding an Adjustment Event
-
You already have one or more video events in your timeline.
-
Choose Insert | Video Track to add a new track to the top of your project.
-
Reorder the tracks so that only the desired tracks are below the new track.
-
Click the timeline within the new track to select it.
-
Place your cursor at the desired starting point for the adjustment event.
-
Choose Insert | Adjustment Event.
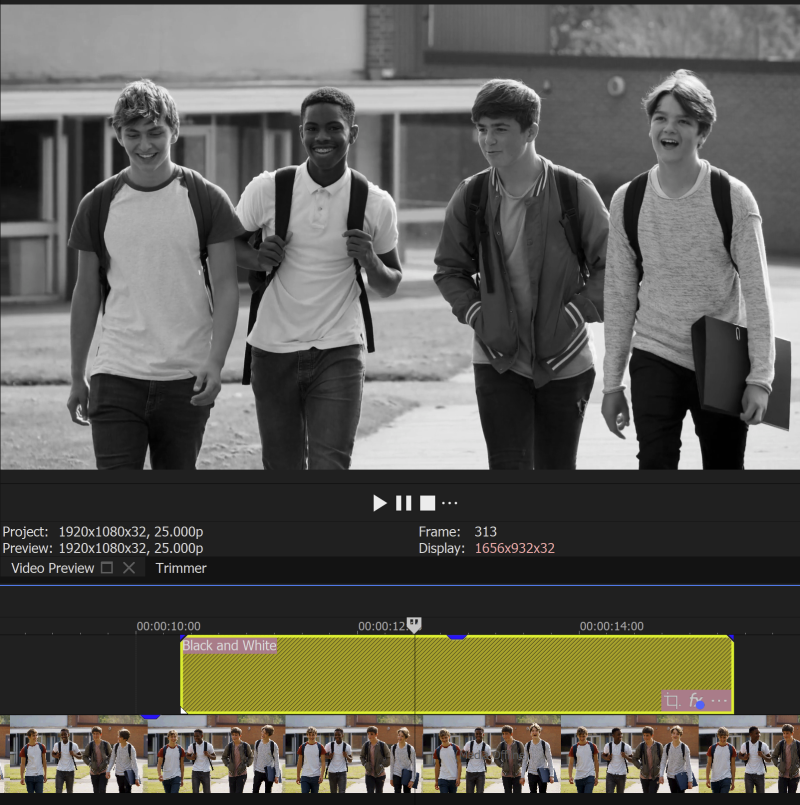
This adds a new event to the timeline, which is an empty event with special shading that indicates it is an adjustment event.
Just like any video event, you can add up to 32 effects in the chain of effects for the event.
Applying Effects to Adjustment Events
Once you've added an adjustment event, you can apply effects to it.
-
Make sure your timeline cursor is within the adjustment event, and notice in the Video Preview window that the adjustment event has no effect on your project.
-
Click the Video FX tab.
-
Choose an effect from the list on the left.
EXAMPLE For instance, assuming the video beneath the adjustment event is a color clip, choose Black and White from the list of effects.
-
Drag the desired preset onto the adjustment event.
-
Preview the effect in the Video Preview window.
The effect has been applied to the video beneath the adjustment event.
Naming an Adjustment Event
You can also name your adjustment events to easily identify and reuse them in your project.
-
Right-click the adjustment event.
-
Choose Properties from the context menu.
-
In the Properties window, enter a name in the Active take name field.
-
Click OK to save the name.
-
To see the name, click the event’s More
 button and choose Active Take Information from the More menu.
Using Multiple Adjustment Events
You can add multiple adjustment events to your project, either on the same track or on different tracks. They can overlap with automatic crossfades or transitions. Experiment with stacking adjustment events to create different effects at different times, either alone or in combination with other adjustment events.
Adjustment Events and Adjustment Tracks
For even more flexibility, you can combine adjustment events with adjustment tracks. This allows you to apply effects to specific tracks or groups of tracks in your project.
Color Grading and Correcting with Adjustment Events
You can use adjustment events in your color grading and correcting workflow. Apply color adjustments using the Color Grading panel, and these adjustments will be applied to the video (or videos) in the tracks below the adjustment events. You can easily copy and paste adjustment events to apply the same grading to other video events in your project.
- Remove all effects from the adjustment event.
- With the adjustment event selected, click the Color Grading button to open the Color Grading panel.
- Make adjustments in the Color Grading panel and notice that these changes are applied to the video (or videos) in the tracks below the adjustment event.
- Once you've finished your grading, you can easily apply the same grading to other video events. Copy the adjustment event and paste it above any other video event(s) to which you want to apply the same grading.
Creating Custom Transitions
Adjustment events can be used to create custom transitions between video clips. By adding effects and animating their parameters, you can achieve unique transition effects. Experiment with different effects and techniques to create the desired transition effects for your project.
- Set up a project with an adjustment event on a track above two video events that are snapped to each other without overlapping.
- Position the adjustment event to span the cut between the two clips below.
- From the Video Event FX window, drag the Default preset of the Linear Blur plug-in onto the adjustment event.
- Click the Animate button for the Amount parameter in the Video Event FX window.
- In the timeline, click the adjustment event at the point where the two video events meet.
- Click the Sync Cursor to Media Timeline button in the Video Event FX window.
- Set the Amount parameter slider to 1.0.
- Click the end of the adjustment event in the timeline.
- Finally, set the Amount parameter slider back to 0.0. (Remember to turn off the Sync Cursor to Media Timeline button afterward.)
-
Click to place your cursor before the adjustment event and play your project.
You’ve just created a simple blur transition between the two clips. And, since the blur exists in the adjustment event, you can simply copy and paste that event and place it over any other two events to add exactly the same transition to those.
To take your custom transitions to the next level, add the Offset and Wrap OFX plug-in to create motion during the transition.
Limiting Adjustment Events to Specific Tracks
You can restrict the effects of an adjustment event to specific tracks in your project.
-
Add another video clip beneath the one currently affected by the adjustment event.
-
Click the Video FX tab and select Picture In Picture from the list of effects.
-
Drag the Upper Left, Scaled, No Angle, Opaque preset onto the upper video event (not the adjustment event).
-
This creates a picture-in-picture composite of the two videos, with both appearing in black and white.
-
Click the More button for the track holding the top video and choose Make Compositing Child from the menu.
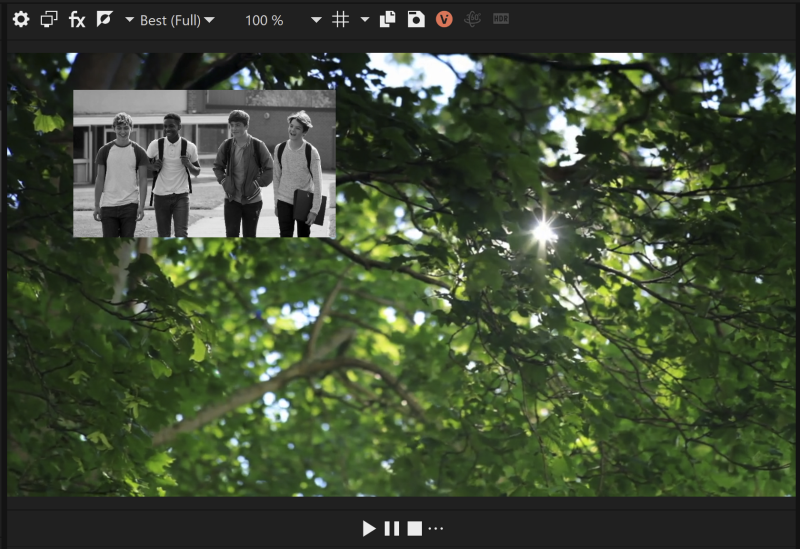
The adjustment event's effect is now limited to tracks that are compositing children of the track holding the adjustment event. Only the inset video remains black and white, while the other video is unaffected.
Using Masking Techniques
You can create various effects by utilizing masking with adjustment events.
-
Insert another video track and position it between the two video tracks.
-
Add a new adjustment event to this track and apply an effect. For example, use the Extreme Blur preset to add a Gaussian Blur filter to the adjustment event.
-
To blur only a portion of your video, use a masking technique. Select the Cookie Cutter effect from the Video FX window and drag the TicTakToe preset onto the new adjustment event.
-
Observe in the Video Preview window that the preset "cuts holes" in the video, masking out the blur effect and revealing the unblurred portion.