Adjustment Tracks
Adjustment tracks provide a way to apply video effects to multiple tracks simultaneously.
Add an adjustment track
From the main menu, choose Insert | Adjustment Track. Any effects you now apply to this track will also affect all tracks below it in your project track list.
How this adjustment track works in your project:
-
Add several video clips to your project, all on different tracks beneath your adjustment track.
-
Add a video file to at least one track above your adjustment track. Stagger all of the video events so that they do not overlap.
-
Click the Track FX button in the adjustment track’s track header.
-
From the Plug-In Chooser, add an easily noticeable video effect such as a Lens Flare.
-
Click in your timeline so that your project cursor sits within one of the events in a track below the adjustment track.
-
In the Video Track FX window, make adjustments to the Lens Flare so that you can see it clearly.
Notice that the effect that you applied at the track level of the adjustment track affects the video in the event on the track below it.
-
Click through your timeline to test all of the other events in your project.
Notice that the Lens Flare shows on every event that sits on a track below the adjustment track, but not on the event that sits on a track above the adjustment track.
-
With your cursor sitting within one of the events below the adjustment track, lower the adjustment track’s Level slider.
Notice that this controls the strength of the effect on all of the tracks influenced by the adjustment track. Set the Level slider back to 100.0%.
-
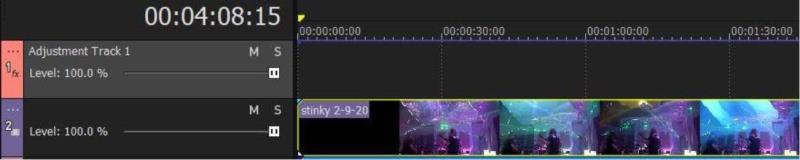
Next, notice that the adjustment track has a blue line running through the top of it. This is the track’s Composite envelope. You can use this envelope to change the adjustment track’s composite level over time.
-
Double-click the envelope to add a point and then change the value of that point.
-
Add more points throughout your project to see how you can raise and lower the strength of the effect over time.
This gives you great flexibility to include an event on a track that would normally be influenced by the adjustment track but set it so the event is not influenced.
-
Button display independence for Adjustment Tracks
You can configure your visible button set for Adjustment tracks independently of regular video tracks. Adjustment tracks show the Track FX button in the track header by default. You can click this button to access the Plug-In Chooser and add the video effects you want to pass through to other tracks. You can also drag video effects directly from the Video FX window onto the Adjustment track header area to add them.
Using the compositing parent/child relationship
You can also use the compositing parent/child relationship between tracks to control which tracks become influenced by the adjustment track.
-
Click the More
 button for the track directly below the adjustment track.
 -
From the menu, select Make Compositing Child.
-
Make the next track down a compositing child of the adjustment track as well.
-
Now, click around your project.
Notice that the tracks that you’ve marked as child tracks of the adjustment track remain under the influence of the adjustment track. But any tracks that are not children of the adjustment tracks--even though they are below the adjustment track--are no longer influenced by it. This gives you great flexibility to choose just the tracks you want associated with the adjustment track.
Multiple effects
You can add as many adjustment tracks to your project as you need. So, say track 1 is an adjustment track. It will influence tracks 2 through 5 (assume no parent/child relationships exist). Now, say track 3 is also an adjustment track. That track will influence tracks 4 and 5, but not track 2 which is above it in the track order. In this case, tracks 4 and 5 are influenced by two different adjustment tracks.
Sometimes you might want to change the video effect on the tracks affected by your adjustment tracks over time. For instance, say you have a three-minute video. During each individual minute you want a different video effect to influence all the tracks below the adjustment track. You have a couple of different approaches to accomplish this.
First, you could add a new adjustment track for each individual minute (in our example above). So, add three adjustment tracks and add one of the three different effects to each of the tracks. Now use your Composite envelopes on these adjustment tracks to “cut” the effect in and out at the appropriate time on each adjustment track. So, at any one time, the effect of only one track passes through to the tracks you want to influence.
To keep your project organized if you use several adjustment tracks in this manner, select each of the adjustment tracks. Right-click one of the selected tracks and choose Track Group | Group Selected Tracks from the context menu. Now click the Collapse Track Group button so that you have just one small track group visible and you can reclaim the timeline space taken by the adjustment tracks.
You can also accomplish the task with just one Adjustment track. To use this method, add the three video effects to the Adjustment track’s Video FX chain. Now find a parameter in each of the video FX that controls the strength of the effect. Click the Animate button for that parameter. Now use the animation timeline and keyframes to turn that effect off when you don’t need it and on when you do. Do this for each of the effects. In this way you can add multiple effects to one adjustment track and control when the effect actually influences the tracks below and when it does not.
You can get quite sophisticated with your tracks and effects by combining all of these features in this way.