Hue vs. Saturation color curve
*new since VEGAS Pro 20 update 1*
This curve allows users to define specific hues or hue ranges and adjust the saturation of those values. This provides precise control over color adjustments, allowing users to enhance or desaturate specific colors in their videos. For example, the user could define a range of blue values and raise the saturation of those values to make the blues in the video more vibrant.
Using the Hue vs. Saturation Curve
-
Add a video file to the timeline and select the video event.
-
Click the Color Grading button to open the Color Grading panel.
-
Navigate to the HSL Curves tab and select Hue vs. Saturation from the Curve Type drop-down list.
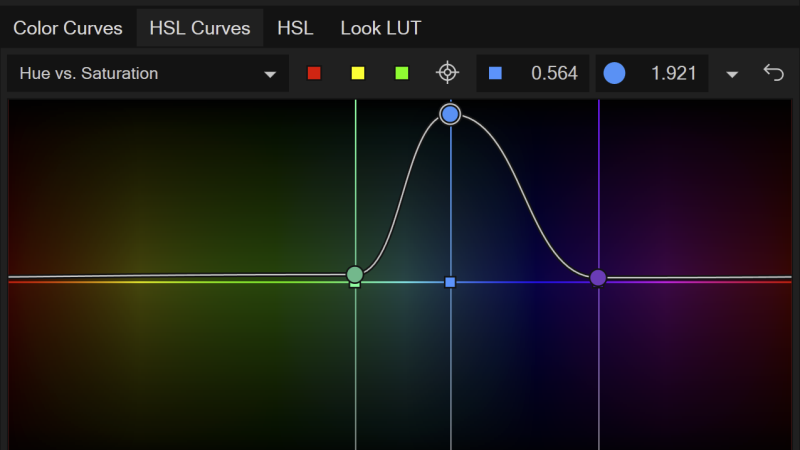
The curve background shows a color spectrum that starts with red at the left, moves through various hues, and ends with red on the right. The white horizontal line in the vertical center of the spectrum depicts the curve.
Defining Color Ranges
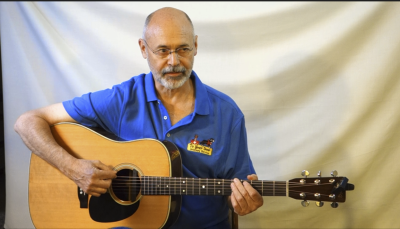
For instance, if you want to change the saturation level of the blues in your video, define a range over the blue shades in the spectrum.
-
Double-click on the curve to define anchor points that represent the desired color range. This adds a point to the curve.
-
Add additional points within the range as needed.
-
To adjust the saturation of the defined range, drag the control point vertically.
-
Experiment with the location of anchor points and control points for precise color adjustments. Any value above the mid line adds saturation, and of course, any value below reduces saturation.
NOTE The vertical line that runs through the point identifies a a saturation spectrum that you can use to target the change you want. If you don’t see the changes you expected as you move the control point, move it left and right as well as up and down.
The adjustments have pumped up the color of the blue shirt to make it much brighter, without affecting the saturation of any of the other colors.
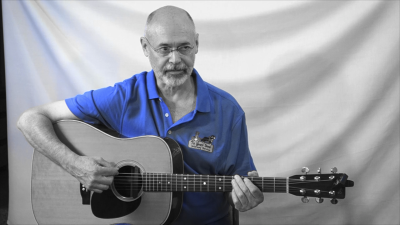
Desaturating everything except a defined range
-
Drag both of the points that define the range all the way down to the bottom of the spectrum. This pulls the color out of everything outside of the range.
-
Use the middle control point to adjust the saturation within the defined range.
-
Fine-tune the range end points or add more points to achieve the desired isolation effect.
To adjust the saturation of the entire video, click the Reset button to set the curve back to the default settings. Double-click the curve to add a control point to it. Drag the control point up. This adds saturation to the entire video. Drag the point down. This removes saturation. Drag the point fully down. This completely desaturates the colors in the image so that you end up with a grayscale image with no color. Note that when the curve has just one point, it doesn’t matter where you locate that point horizontally—it always adjusts the entire curve which remains flat and thus effects the entire video.