Utilities
Controls have been added to the Color Grading panel that enable you to easily adjust the brightness and contrast of your video. You can use these tools to help correct exposure problems in your video as well as for special effect. To use them, click the Color Grading button to open the Color Grading panel.
Select an object that you want to apply color grading to.
Make sure to set the Add to FX Level button to the level of the object you’ve selected. For instance, select an event on the timeline and choose Event FX from the Add to FX Level drop-down list.
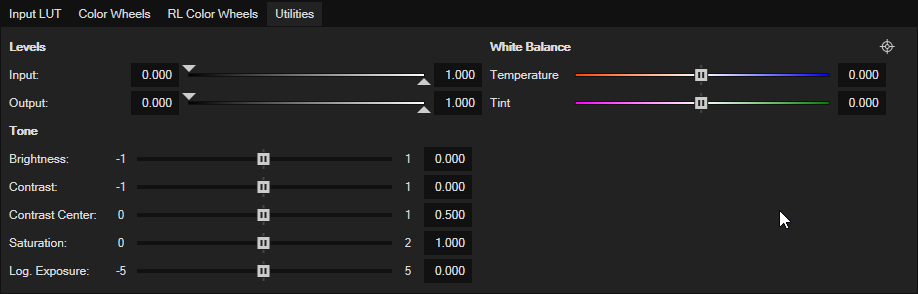
To make your video lighter or darker, adjust the Brightness slider.
-
A setting of -1.0 results in darkening your video to pure black.
-
A setting of +1.0 results in pure white.
Contrast in your video represents the absolute difference between the darkest and lightest areas of your video image. To create a wider range of values between the darkest and lightest areas in your video, drag the Contrast slider to the right. This can have the effect of making your video “pop” and feel richer and warmer. Too much contrast begins to cause detail loss in the darkest and brightest areas and can begin to make your video seem unnatural.
To create a narrower range of values between bright and dark, drag the Contrast slider to the left. This makes the difference between bright and dark less defined. As you lower the contrast, your video begins to look “flatter” and eventually may turn completely gray as you remove any difference between the bright and dark areas.
Typically, the right amount of contrast is fairly subtle, but again, you can use this setting for special effects if you choose.
To achieve different results with the same Contrast setting, adjust the Contrast Center slider. This sets the anchor point for distributing the color values. When you decrease the Contrast Center setting, your Contrast setting focuses more on the darker color area. When you increase the Contrast Center setting, your Contrast setting focuses more on the brighter areas.
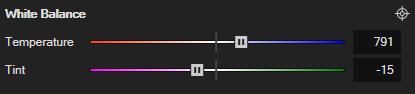
White Balance controls
*new since VEGAS Pro 20*
Different types of lights have different color temperatures with sunlight of around 5,700 Kelvin being used as a “natural-light” baseline target. If video has been shot without accounting for the proper lighting temperature through proper camera settings, colors can look unnatural and tinted. The White balance controls in the Color Grading panel help you correct footage shot with improper in-camera white balance.
-
Add a video file to your timeline.
-
Click the video event to select it and open the Color Grading panel | Utilities tab.
To change the video’s color temperature, adjust the Temperature slider.
-
Move the slider to the right to add blue to your image, thus cooling the color temperature.
-
Move the slider to the left to add red and warm the temperature up.
To darken the image:
Move the Tint slider to the left in order to add magenta.
To brighten the image:
Move the Tint slider to the right to add green to the image.
To let the software sample your neutral colors and automatically adjust the temperature in an attempt to reach the color of sunlight:
-
Click the Select neutral tone
 button.
 -
Point your mouse to a neutral color (white or gray) in your image.
Notice that the Select neutral tone
button has changed to a color square that shows the color you are currently pointing to. -
When you have the color you want:
-
Click the Video Preview window to sample the pixel you click on. Or,
-
hold the mouse button down and draw an area rectangle to take an average value of the area you define.
-
VEGAS Pro samples the chosen color or range and adjusts the Temperature slider to automatically adjust your white balance.