Upscale
The VEGAS Pro Upscale effect enables you to convert low-resolution video to higher resolutions. For example, you can apply it to HD footage so that you can use it in a 4k project. You can also use it to zoom in on video and preserve apparent resolution. Through the power of AI, VEGAS Upscale produces superior quality upscale and zoom effects.
Step 1: Install the VEGAS Deep Learning Models
Like the other AI-powered effects in VEGAS Pro, in order for the Upscale effect to work properly, you must first install the VEGAS Deep Learning Models. Follow the link that you received with your VEGAS Pro purchase to download the Deep Learning Models installer.
Step 2: Drag the Upscale effect to the left of Pan/Crop in the plugin chain
When you add the VEGAS Upscale effect as a timeline clip event effect, a warning message informs you that you must drag the Upscale effect to the left of Pan/Crop in the plugin chain. To change the order, drag the Upscale button at the top of the Video Event FX window to the left and drop it before the Pan/Crop button, as you see in the image below.
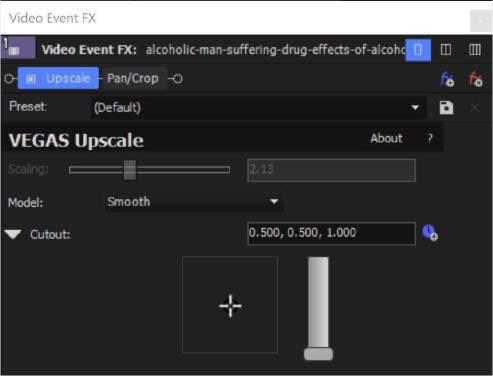
Step 3: Adjust upscale level
Once you’ve properly ordered your effects chain as discussed above, a Scaling slider appears.
Use as a video event effect:
When you use the VEGAS Upscale effect as a video event effect, the Upscale plugin automatically upscales the video to your project's resolution as defined in Project Settings, so this slider remains inactive since you don’t need it. But it does tell you the value of the automatic setting, as you can see in the image.
Use as a media effect:
If you use the plug-in as a media effect, the slider becomes active and you can adjust it to whatever upscale level you choose.
-
Drag on the crosshair icon in the Cutout section to pan through the image. Use the arrow keys on your keyboard for fine adjustments.
-
Adjust the Zoom slider to zoom in and out of your image with the crosshair icon as the target for the zoom midpoint.
-
To enter exact values for position and zoom, select the values in the Cutout text field and enter the values you want. The first two numbers represent the X and Y coordinates of the crosshair target and the third value represents the current zoom level.
-
To enable animation of these settings, click the Animate button.