Setting up your stereoscopic 3D project
The Video tab in the Project Properties dialog allows you to configure options for working in 3D. For more information, see Setting project properties
By default, the project's Stereoscopic 3D mode, Swap Left/Right, and crosstalk cancellation settings will also be used when previewing and rendering your project, but you can override the project settings if necessary.
-
From the File menu, choose Properties. The Project Properties dialog is displayed.
-
Choose a setting from the Stereoscopic 3D mode drop-down list.
-
Select the Swap Left/Right checkbox if you need to switch the left- and right-eye pictures. This setting is useful if you're using a line-alternate display that displays the right eye on top, if you're using magenta/green anaglyphic glasses, or to create cross-eye free-view 3D.
-
Drag the Crosstalk cancellation slider if you experience image bleed-through. For example, if you see right-eye images in your left eye, you can adjust the Crosstalk cancellation slider to compensate.
When your project's Stereoscopic 3D mode is set to Side by side, Top/bottom, Line alternate, or Checkerboard mode, crosstalk cancellation is active only when the Full-resolution rendering quality drop-down list is set to Good or Best. When using anaglyphic modes, crosstalk cancellation is active for any quality level.
-
Select the Include cancellation in renders and print to tape checkbox if you want to use the Crosstalk cancellation setting in your final rendered output. Clear the checkbox if you want to use crosstalk cancellation for previewing only.
|
Setting |
Description |
|---|---|
|
Off |
Choose this setting when creating a 2D project. |
|
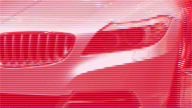
Choose this setting when your project will contain left- and right-eye views in a single frame. Left- and right-eye views are displayed as half of the available horizontal resolution. In this example, the left-eye image is tinted blue, and the right-eye image is tinted red:
|
|
|
Side by side (full) |
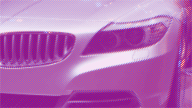
Choose this setting when your project will contain left- and right-eye views in a single frame. Left- and right-eye views are displayed using the full horizontal resolution. In this example, the left-eye image is tinted blue, and the right-eye image is tinted red:
|
|
Choose this setting when your project will contain left- and right-eye views stacked in a single frame. Left- and right-eye views are displayed as half of the available vertical resolution. In this example, the left-eye image is tinted blue, and the right-eye image is tinted red:
|
|
|
Top/bottom (full) |
Choose this setting when your project will contain left- and right-eye views stacked in a single frame. Left- and right-eye views are displayed using the full vertical resolution. In this example, the left-eye image is tinted blue, and the right-eye image is tinted red:
|
|
Anaglyphic (amber/blue) Anaglyphic (green/magenta) |
Left- and right-eye views use color filters to allow anaglyphic glasses to separate the left- and right-eye views.
|
|
Choose this setting when your project will be displayed on a line-alternate 3D monitor. Left- and right-eye views are interlaced using half of the available vertical resolution. In this example, the left-eye image is tinted blue, and the right-eye image is tinted red:
|
|
|
Choose this setting when your project will be displayed on a DLP-based 3D monitor. Left- and right-eye views are tiled using half of the available horizontal and vertical resolution. In this example, the left-eye image is tinted blue, and the right-eye image is tinted red:
|
|
|
Right only |
Choose the Left only or Right only setting for editing on a 2D monitor or if you're creating separate output files for the left- and right-eye outputs. In this example, the left-eye image is tinted blue, and the right-eye image is tinted red:
|
|
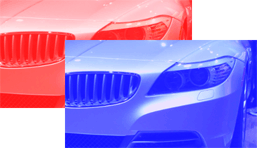
Choose this setting to blend the left- and right-eye images. This setting is useful when adjusting events.
|
|
|
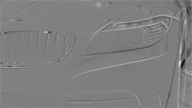
Difference |
Choose this setting when performing vertical adjustments to minimize vertical disparity.
|
.png)
.png)
.png)
.png)
.png)