Using the Device Explorer
The Device Explorer allows you to browse and import clips from AVCHD, XDCAM EX, NXCAM, XAVC, XAVC S, Panasonic P2, and RED ONE/EPIC/SCARLET/WEAPON devices; CompactFlash-based memory recording units such as the HVR-MRC1; and hard-disk-based recording units such as the HVR-DR60.
 For more information, see Working with AVCHD videoXDCAM EX workflow and Working with RED camera clips
-
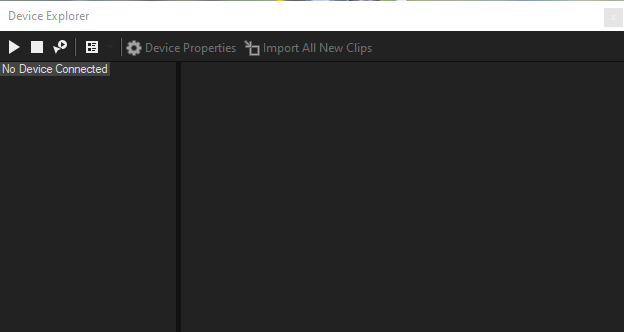
Choose View | Window | Device Explorer. The Device Explorer window is displayed.
-
Connect your camera to a USB port on your computer. The camera is displayed on the left side of the Device Explorer window.
-
Select your camera on the left side of the Device Explorer window. The camera's clips are displayed on the right side of the window, and clips that have not yet been imported are indicated with a yellow icon
 .
.
-
If you want to use clips from a folder on your computer, right-click the left pane of the Device Explorer window and choose Browse from the shortcut menu.
-
In order for some devices to appear in the Device Explorer window, you may need to change the device's USB Connect setting from Automatic or MTP to Mass Storage.
Previewing clips
Select your camera on the left side of the Device Explorer window. The camera's clips are displayed on the right side of the window, and clips that have not yet been imported are indicated with a yellow icon .
If the Auto Preview button  is selected, you can click a clip in the Device Explorer to audition it. You can stop the preview by clicking the Stop Preview button
  , or you can turn off the preview feature by deselecting the Auto Preview button.
TIP Video is previewed in the Trimmer window. If you want to preview in the Video Preview window, right-click the Trimmer window and deselect the Show Video Monitor command. For more information, see Using the Trimmer
When the Auto Preview button is not selected, click the Start Preview button  to start preview.
Choosing the folder where you want to import clips
-
Select your camera on the left side of the Device Explorer window and click the Device Properties button
 .
.The Device Properties dialog is displayed, and the Capture Folder box displays the path to the folder where imported clips will be saved.
-
Click the Browse button to display the Capture Folders dialog. This dialog lists the available folders for saving your imported video:
-
Select a folder's checkbox to save your imported video in that folder.
-
Click the Add Folder button
 and browse to a folder to add a new folder.
 -
Select a folder in the list and click the Remove Folder button
 to remove it from the list.
-
Importing clips
-
Select your camera on the left side of the Device Explorer window. The camera's clips are displayed on the right side of the window, and clips that have not yet been imported are indicated with a yellow icon
. -
Click the Import All New Clips button
 to import clips to the Project Media window:
 -
If clips are selected in the Device Explorer window, only the selected clips are imported (you can hold Ctrl while clicking to select multiple clips).
-
If no clips are selected in the Device Explorer window, all new clips are imported.
-
You can then use the Project Media window to organize your clips and add the imported video to your project just like any other media file.
For more information, see Adding media files to your project For more information, see Working with AVCHD videoXDCAM EX workflow and Working with RED camera clips
TIP Right-click a clip in the Device Explorer window and choose Open in Trimmer or Import and Add to Project to choose how you want to import clips.
NOTE 5.1-channel audio will be downmixed to stereo when importing into a stereo project. When importing into a 5.1 surround project, audio will be added to separate tracks for the center, front, rear, and LFE channels.
TIP You can also drag a clip from the Device Explorer directly to the Project Media window, Trimmer, or timeline. VEGAS Pro begins importing the clip when you release the mouse, and an event is created on the timeline when importing is finished.