Converting speech to text (AI)
The "speech to text" feature recognizes spoken language in audio and video files and converts it into synchronized title objects displayed as text on separate tracks, which can be flexibly adapted, highlighted or exported.
-
Automatic subtitling of a short interview
-
Word-for-word text overlay for karaoke and music videos
-
Export accessible subtitles for social media videos
Analyzing speech
-
To use this feature, you need to log into MAGIX Hub. This feature allows you to analyze speech as well.
-
Open Timeline mode .
-
Add an audio or video file that contains speech to the timeline in the project window.
-
Right-click on the object in the project window and select:
-
for audio objects: Speech to text.
-
for video objects: Audio features → Speech to text.
-
-
Select a language, or leave this feature set to Auto Detect to have the language detected automatically.
-
Click Start analysis.
Once the speech has been analyzed, the detected language will be shown.

You do not have to create title objects once the analysis has finished. Instead, you can select one of the following options or combine several of them:
- Edit Text
- Exporting subtitles
- Highlight spoken words
Create title objects
-
Click on Create title.
The created title objects will be added to a new track in the project.

FIGURE Created title objects in the timeline
Editing generated text
Language transcripts often contain errors. Background noise, unclear pronunciations and strong accents can produce inaccurate results. There are two options for making changes to generated text:
Making corrections in the analysis window
- Click on a text entry in the analysis window.
- Change the text directly in the editing field that appears.

FIGURE Correction directly in the dialog
Making corrections in the title editor
-
Double-click a title object in the timeline in the project window.
-
Change the text in the title editor or directly in the preview monitor.
 For more information, see Create titles.
Visually highlighting words
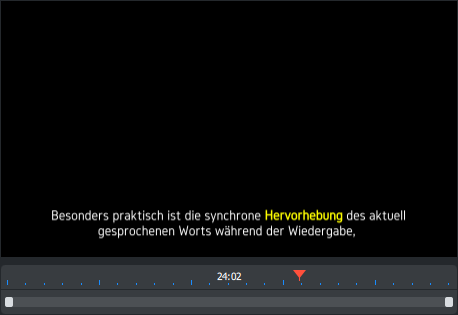
You can automatically highlight spoken words in the title text while the audio is playing. This makes it easier to follow spoken content, e.g. when learning a language or in accessible videos.
-
When the analysis has finished, click on the "ABC" button
 to enable this option.
 -
Click on Create highlight titles.

The created title objects will be added to a new track in the project.
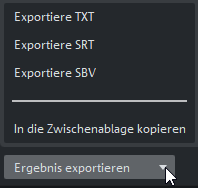
Exporting subtitles
Automatically generated subtitles can be saved in various formats for further use on other platforms or for archiving.
-
Once the analysis has finished, click on the Export result button and select the desired export format.
| Format | Description | Use for |
|---|---|---|
| .srt | Standard format for subtitles | Direct import on YouTube and Vimeo |
| .sbv | YouTube-compatible format | An alternative to .srt |
| .txt | Raw text with timing information | Archiving, editing |
| Clipboard | Copying subtitles as text, without timing information | Direct insertion into other applications |
Last time changed: October 27, 2025