Audio effects
Audio effects in the Media Pool
The Media Pool offers various creative options for adding effects to audio objects. Another advantage of these "object-oriented" effects is that the effect settings, including automations are moved automatically with objects when they are moved, since they are attached to the object and not to the track itself.
Under "Effects" > "Audio Effects" > "General" you'll find other audio effects besides volume and panorama, including DeClipper, DeNoiser, DeHisser, equalizer, compressor and StereoFX (these are all contained in the Audio Cleaning Editor), echo/reverb, timestretch/resample, a sharp filter, a soft filter and distortion.
The faders AUX 1 and AUX 2 control the volume at which the object's signal is sent to the corresponding FX tracks in the mixer.
NOTE Volume and balance curves are also present in the track. The set values of the curves add up respectively.
Audio effect presets
In the Media Pool you'll find a broad palette of effect settings which you can apply to audio objects via drag and drop.
Using audio effects
Object effects
Individual, customizable effects or preset effect templates are also available for audio objects. These are only applied to the corresponding, selected object. These effects can be found in the Media Pool under "Effects" > "Audio effects" or in the menu under "Effects" > "Audio object effects".
Track effects
Track effects always apply to all audio objects of a track. They are set in the mixer. Open the Mixer using the M key.
Audio effect plug-ins
(only Movie StudioPlus/Premium version) supports VST effect plug-ins. These are usually effect modules such as reverb, equalizer, dynamic compression, etc.
Installation:
The relative plug-ins must be installed before before using the audio effect plug ins. The installation of the plug-ins is carried out depending on the type of plug-in that is used. VST plug-ins are usually stored in a certain folder.
In Movie Studio, you need to enter the folder for the VST plug-ins in their path settings. After the path has been indicated, Movie Studio scans it for working plug-ins and makes them available for use.
Using plug-ins:
Plug-in effects can be used in an audio effects rack at the track, object, and master level.
 Clicking this button lets you insert plug-in effects. The effects user interface will then be opened and active. After having closed the user interface, you can reopen it by double-clicking the plug-in name.
 This button removes effects from the rack. Since deactivated effects don't use up any computing power, this option is used mostly for maintaining an overview.
Master effects
Master effects influence the mixed sum of all audio tracks. To this end a Master Audio Effects Rack and additional plug-ins are installed in the Mixer window. Plus/Premium version, there is additionally the special MAGIX Mastering Suite for the perfect sound.
The Audio effects dialog
Some of the following effects can be opened individually (context menu) or occasionally as part of the track or master effects rack. However, the functionality remains the same.
Effect devices controls
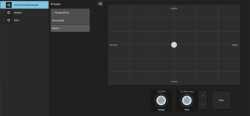
Some effect options (e.g. options from the "Echo/Reverb" or "Time stretching" effects menu) open a graphic interface that recreates an audio studio effect.
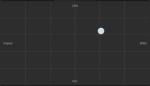
These virtual effects are controlled in the conventional way by using slider controls, turning knobs, or buttons, or alternatively using the graphic sensor fields.
Sensor fields: You can control sensor fields intuitively with mouse movements. The graphics and the respective effect setting change in response to each other.
Power switch:
 Every effect device in the rack may be switched on or off separately. This button allows you to directly compare the neutral, unedited sound of the audio object with the effect setting you have chosen.
Reset: Every effect has a reset button that restores the effect device’s initial default state. In this starting point, no computing power is required and no effect is added to the sound
Each effect device features a selection of presets that can be selected via the drop-down menu.
A/B: The A/B button compares two settings with each other. If you have selected a preset for the effect and make manual changes to it later, you can compare the original preset sound with the new settings by using the A/B button.
Timestretch/Resample
This effect device changes the object's speed and/or pitch.
Tempo: This control changes the tempo independent of the pitch ("time stretching"). The object acts as if it were compressed or stretched on the track.
Pitch: This control changes the pitch independent of the speed of the object ("pitch shifting").
+/- buttons: Use this feature to change the pitch in semitones.
Setup: This button opens a setup dialog where you can select various pitch shifting and time stretching procedures.
- Standard: Time stretching and pitch shifting in standard quality. The method is suitable for audio material without a pronounced beat. Existing beat markers are evaluated to improve audio quality.
- Smoothed: Time stretching and pitch shifting for audio material without abrupt elements. The method is suitable for several voice orchestra instruments, surfaces, speech and singing. Beat markers will not be evaluated. A significantly more demanding algorithm is used for this, which requires more processing time. The material may also be used with very large factors (0.2... 50) without causing severe artifacts. To do this, the material is "smoothed" to give it a softer sound and a different phase length. This smoothing is hardly audible, e.g. with speech, singing, or solo instrumentation. More complicated spectra – such as a sound mixture containing different instruments or a finished mix – can cause problems.
- Beat marker slicing: Beat-synchronized time stretching and pitch shifting via splitting and temporal repositioning. Exactly set beat markers are required at the beats or transients. Markers can be generated in real time (automatically) or read out from the source file, as long as they are available (patched). The MAGIX Music Editor contains a patch tool which allows the user to set markers manually. The algorithm is suitable for rhythmic material that can be divided into individual beats or notes. This requires that the material contains low levels before and after the individual beats or notes.
- Beat marker stretching: Beat-synchronized time stretching and pitch shifting in high audio quality. The material is stretched between beat markers positions so that the impacts or attacks at the beat markers positions are not impaired by stretching. The markers can be generated in real time from the audio material (automatically), provided they are present (patched). This method is suitable for rhythmic material that cannot be divided into individual beats or notes because the beats or notes overlap each other.
- Beat Marker Stretching (smoothed): Beat-synchronized time stretching and pitch shifting in high audio quality, even with more intense time stretches. Beat markers are used at the beats or transients. The markers can be generated in real time from the audio material (automatically), or read out from the wave file, provided they are present (patched). This method is suitable for rhythmic material that cannot be divided into individual beats or notes because the beats or notes overlap each other. This method requires a relatively high amount of processing time. If you have a slow system, you should only use it if needed.
- Universal HQ: A universal time stretching and pitch shifting method for very high audio quality. Suitable for all types of audio material. Existing beat markers are evaluated to improve audio quality. This method requires so much processing time, that a real-time application is recommended only in exceptional situations.
- Monophonic voice: Time stretching and pitch shifting for vocal solos, speech or solo instruments. Your material should be free of any background noises; strong reverb can also make it difficult to apply this method. With suitable material the audio quality is very high. In addition, the formants remain when pitch shifting. Beat markers will not be evaluated.
- Resampling: Pitch shift and tempo can not be changed individually. This method requires comparably little CPU time.
Reverb
You can control the sound of the reverb effect using the following parameters:
Room Size: Defines the size of the room (or the system for the plate and spring). The larger a room, the longer the sound travels between walls or objects. With some low "size" settings you can also reduce the distance between the individual reflections. This allows resonance to develop (accentuated frequency ranges), which can sound oppressive if the reverb sustain is too long.
Tone Quality: You can manipulate the sound characteristics of the effect to an extent. The effect of this controller depends on the preset used. In rooms, "Color" controls the dampening of the highs in the reverb (from dark to bright) as well as pre-filtering of the signal. With plate and spring presets, this fader determines the dampening of the basses as well.
Reverberation Time: With this knob you can adjust the reverberation time and determine how much of it will be absorbed and, simultaneously, the reverb's decay.
Pre-Delay: The reverb portion ("Mix") and the early reflections play a big role in the spatial perception of the sound. Here the time required for the perception of the early reflection is know as "pre-delay". For sound sources that are close, the reverb portion is usually low, and the early reflections reach the ear noticeably later than the direct sound. By contrast, sound sources that are far away usually have a high reverb portion, and the early reflections reach the ear almost simultaneously with the direct sound. The length of the pre-delay can be used to influence the perceived "distance" between the sound source and the listener.
Mix: This controller sets the mix ratio between the original and the edited signal. For rooms, you can move a signal further into the room by increasing the effect share. The last four presets are intended for use in an AUX channel of the mixer and are set to 100%.
Presets:
The presets represent the basic settings for the various room algorithms, which can be varied along with the other parameters. In this respect, they are more than just parameter sets.
Echo
This effect is like an echo which delays the signal and repeats it.
Delay: This sets the period of time between the individual echoes. The more the control is turned to the left, the faster the echoes will follow each other.
Feedback: This adjusts the amount of echo. If you turn the dial completely to the left, there is no echo at all; if you turn it completely to the right, there are seemingly endless repetitions.
Mix: This fader determines how much of the unprocessed original sound (dry signal) is subjected to the echo (wet signal).
Audio effects in the Mixer
 The Audio effects rack is opened in the mixer via the "FX" button for each track or in the master area on the right.
Mastering also features the MAGIX Mastering Suite.
Reset clears all effect settings.
10-band Equalizer
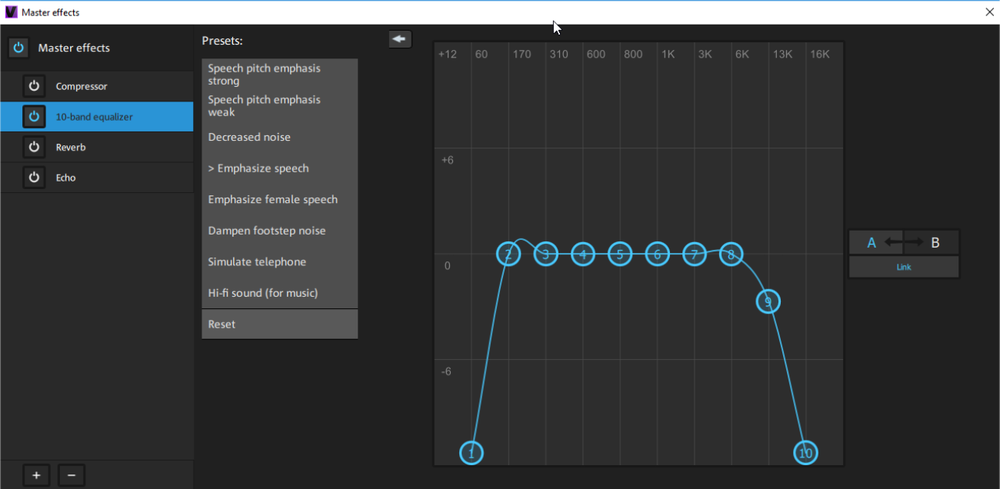
The 10-band equalizer subdivides the frequency spectrum into 10 areas (‘bands’) and equips them with separate volume controls. This makes it possible to create many impressive effects, from a simple boosting of the bass to complete distortion. Note: If low frequencies are boosted too much, the overall sound level is heavily increased, which may cause distortion. In this event, adjust the overall volume downward by using the "master volume" control situated at the bottom center of the effect rack.
Slider control: Each of the 10 frequency ranges can be separately boosted or turned down with the 10 volume controls.
Link bands: Using this button randomly combines the frequency ranges with each other in to avoid artificial-sounding overemphasis of an individual frequency range.
Touch screen (right EQ section): This is the "sensor field" of the EQ. Here you can draw any type of curve with the mouse. This will be immediately translated into a corresponding control setting on the left side of the EQ.
Compressor
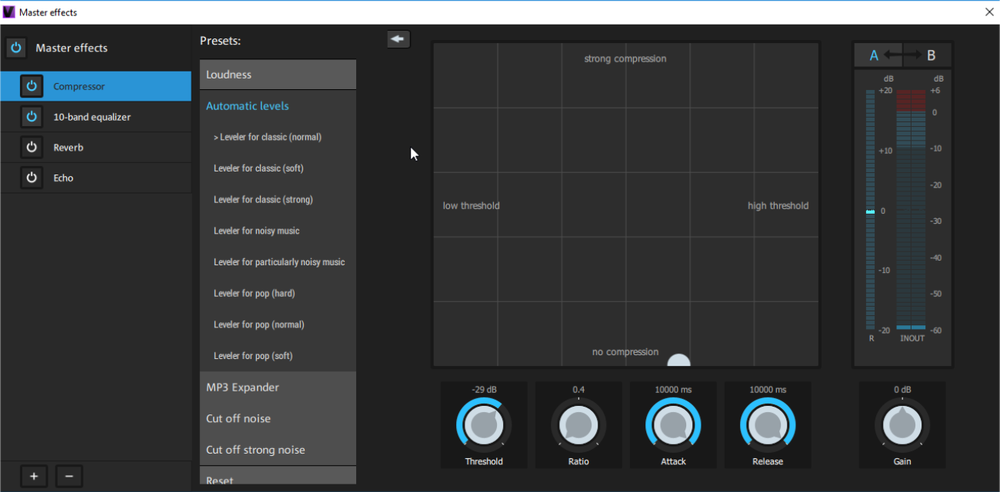
The compressor is an automated, dynamic volume adjustment controller. Louder passages become quieter and quiet passages become louder. A compressor is useful to make spoken passages more audible against background noise or music in case simple increase of the overall volume is insufficient. Several useful presets are included for this purpose, however compression may also be set manually.
Threshold: Set the volume threshold, below and above which compression is applied.
Ratio: This parameter controls the amount of compression.
Attack: Sets the algorithm's reaction speed to increasing sound levels.
Release: Sets the algorithm's reaction speed to falling sound levels.
Gain: The gain controller amplifies the compressed signal.
Create mono objects
Mono recordings can leave noise on the second track, e.g. a mono microphone recording. You can deactivate the track with the noise by selecting the function Use only left side or Use only right side (but not with mono videos).
You can find this function in the audio and video object context menu under Audio functions.