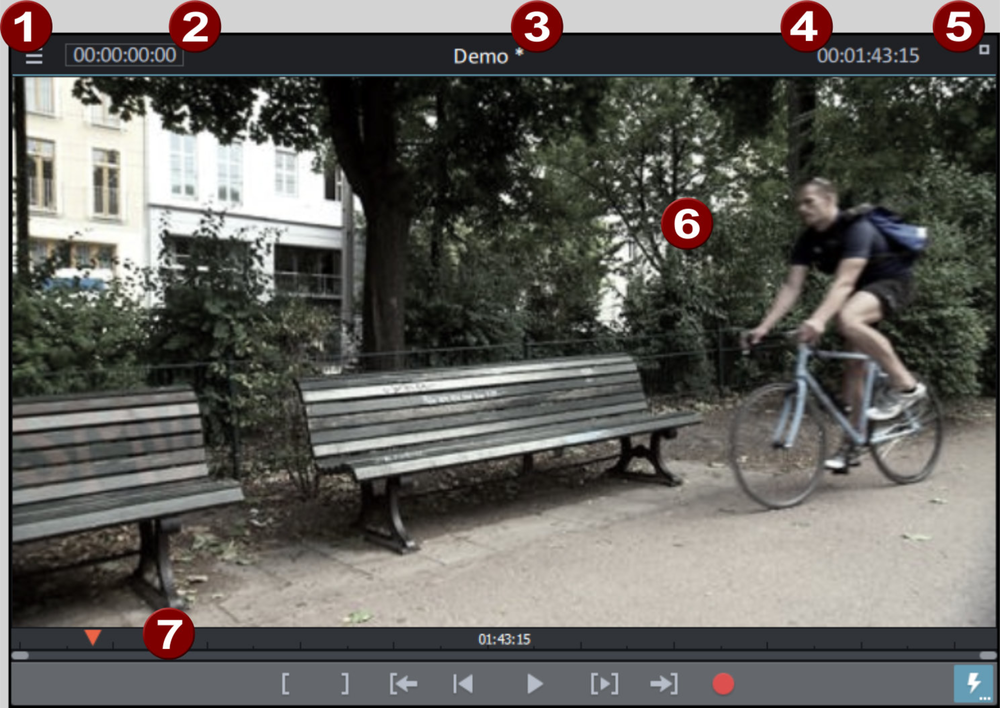
Program monitor with transport control
The program monitor (preview monitor) displays the content of the current movie. In some cases the program monitor is also used for editing certain effects. Examples of this are:
- Title Editor
- Various movement effects
- The program monitor additionally shows the time position of the playback marker as well as the length of the movie.
|
1 |
Program monitor menu |
|
2 |
Playback marker position |
|
3 |
Title bar; shows the name of the current film |
|
4 |
Length of current film |
|
5 |
Full-screen mode button |
|
6 |
Area to view |
|
7 |
Transport control |
In addition to showing the current film, the program monitor also performs the following functions:
- Preview of video and image files
- Inserting sections of video files into the movie
- Movie overview
- Fullscreen mode
Options
- 3D display
- Set size (resolution)
- Move position (with time bar)
Menu in program monitor
 Das Menü des Programmmonitors wird über die Menüschaltfläche geöffnet.
The following functions can be selected:
- Define zoom factor
- Specify image position for preview
- Activate movie overview
- Fade jog and shuttle in and out.
- Set program monitor standard (2D) view
- Activate 3D playback
- Activate 360° display
- Access to the Performance Menu (this is also in the context menu of the Preview quality button)
Zoom
The video image in the program monitor can be minimized and maximized with the help of the menu entry. This comes into use especially during effect animation.
NOTE This zoom only affects the current display in the program monitor and is not applied like a video effect.
You can click the mouse on a specific point in order to zoom in on it. In zoom mode, you can use the tracker to make even more precise adjustments. This makes it much easier to work on fine details and adjust animations precisely.
Fullscreen mode
The program monitor can be expanded to full-screen size.
Activate fullscreen mode:
- Double-click in the program monitor display area,
- press the key combination Alt + Enter or
- click the button at the top right edge of the program monitor.
- Pressing escape (Esc) exits full-screen mode.
NOTE The program monitor can also be moved in full-screen mode, and a special context menu (right mouse button) is also available. The transport control can be faded out.
Show/hide transport control:
- Right click to open the context menu in the program monitor display area. You can see the current status of this setting in the check box before the menu entry Show transport control.
- Select the entry Show transport control. The transport control will be shown or hidden accordingly.
Set size
TIP Nützliche Voreinstellungen für Arranger und Programmmonitor finden Sie auch im Reiter Anzeige-Presets in den Programmeinstellungen!
Set size:
- Move the mouse cursor to the edge of the program monitor. This turns the mouse pointer into a double arrow.
- Click and hold the left mouse button over the edge of the program monitor.
- Drag the program monitor to the desired size.
- Release the mouse button.
NOTE Setting the size freely is easier if you set the width and height of the program monitor one after the other.
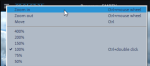
Set size via the context menu:
- Right click to open the context menu in the program monitor display area.
- Select the desired size in the context menu:
- By default: Choose an entry in the Default resolution submenu.
- Manually: Select the entry Other resolution and enter the desired resolution in the dialog.
Use movie to define size:
You can also determine the size according to the size of the movie or an individual video clip in the movie.
- In the project window, select the video object you want to use to determine the size of the program monitor.
- Right click to open the context menu in the program monitor display area(6).
- Select the entry Adjust program monitor to selected video.
Movie Studio will adjust the size of the program monitor to fit the resolution of the selected video object.
Use movie settings to define size:
- Right click to open the context menu in the program monitor display area(6).
- Select the entry Adjust program monitor to movie settings.
Movie Studio sets the resolution in the movie settings as the new program monitor size.
NOTE If the new resolution of the program monitor is greater than that of the screen you are using, you will receive a corresponding warning message from Movie Studio and can cancel or continue the action.
Transport controls
Transport controls on the program monitor enable you to play back video and image material in the project window or as a preview in the Media Pool.
![]()
NOTE To use the jog/shuttle functions, they must be made visible in the menu.
| Range
|
Above the playback functions you can select the range between the in and out points using the mouse. |
| Playback markers
|
This marker indicates the position of the image currently displayed by the program monitor. |
| Set in/out points
|
Defines the start and end of the playback range. |
|
To range start
|
This button sets the playback marker to the start of the current range for control purposes. |
|
Jump to movie start
|
Sets the playback marker to the start of the movie. |
|
Playback/stop (pause)
|
The playback button in the middle starts playback. A second click stops playback. TIP In the menu File > Settings > Program > Playback, you can set whether the playback marker will go back to the start position (stop) after the second click or following the appropriate shortcut (space bar), or if it should stay at the current position (pause function). |
|
Range playback
|
This button plays the current range. |
|
To range end
|
This button sets the playback marker to the end of the current range. |
|
Audio or video recording
|
Quickly jumps to recording selection. |
|
Jog wheel
|
Using this wheel, you can move by single frames within the video and zoom in for precise positioning of the playback marker. |
|
Shuttle control
|
The further the slider control is moved to the side, the quicker the arrangement is played in the corresponding direction. This way a specific position can be reached quickly. NOTE Jog wheel and shuttle control are hidden by default. Use the menu of the program monitor to set them to display. |
|
Preview quality
|
Activate smooth playback if playback becomes choppy. |


Preview Quality
You can enable a smoother preview if playback performance is poor. This setting does not have any effect on the quality of video files when exporting or burning to DVD.
Poor playback performance can be caused by the following:
- Under-performing hardware
- High-resolution source material (4K)
- A very complex project
Right-click in the transport console on the  symbol to open the context menu.
The following options are then available:
- Reduce resolution
- Reduce frame rate: Reduces the number of frames per second.
- Deactivate effects: All effects and plug-ins will be activated/deactivated.
- Using proxy objects (see Using proxy files, proxy editing)
NOTE "Reduce resolution" and "Reduce frame rate" are preset.
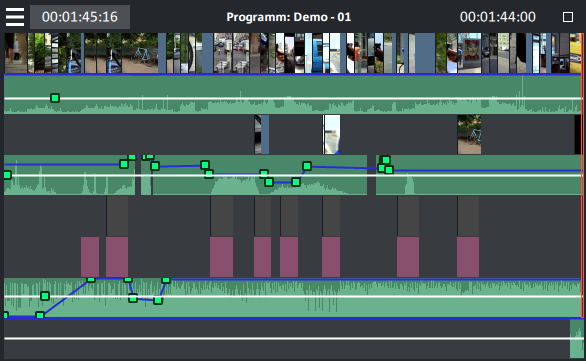
Movie overview
The option Movie overview in the Window menu provides an overview of the entire project. All objects in the project window are displayed in the program monitor. The overview display is especially recommended for working on long movies because the reduced overview in the program monitor can be combined well with the zoomed detailed view in the project window.
The movie overview can be used for moving around in the movie and editing specific parts:
Drag out a frame in the program monitor to zoom into the corresponding area in the project window.
NOTE If you use this function often, you can use the following keyboard shortcut for quick switching: Shift + A.