Timeline mode 
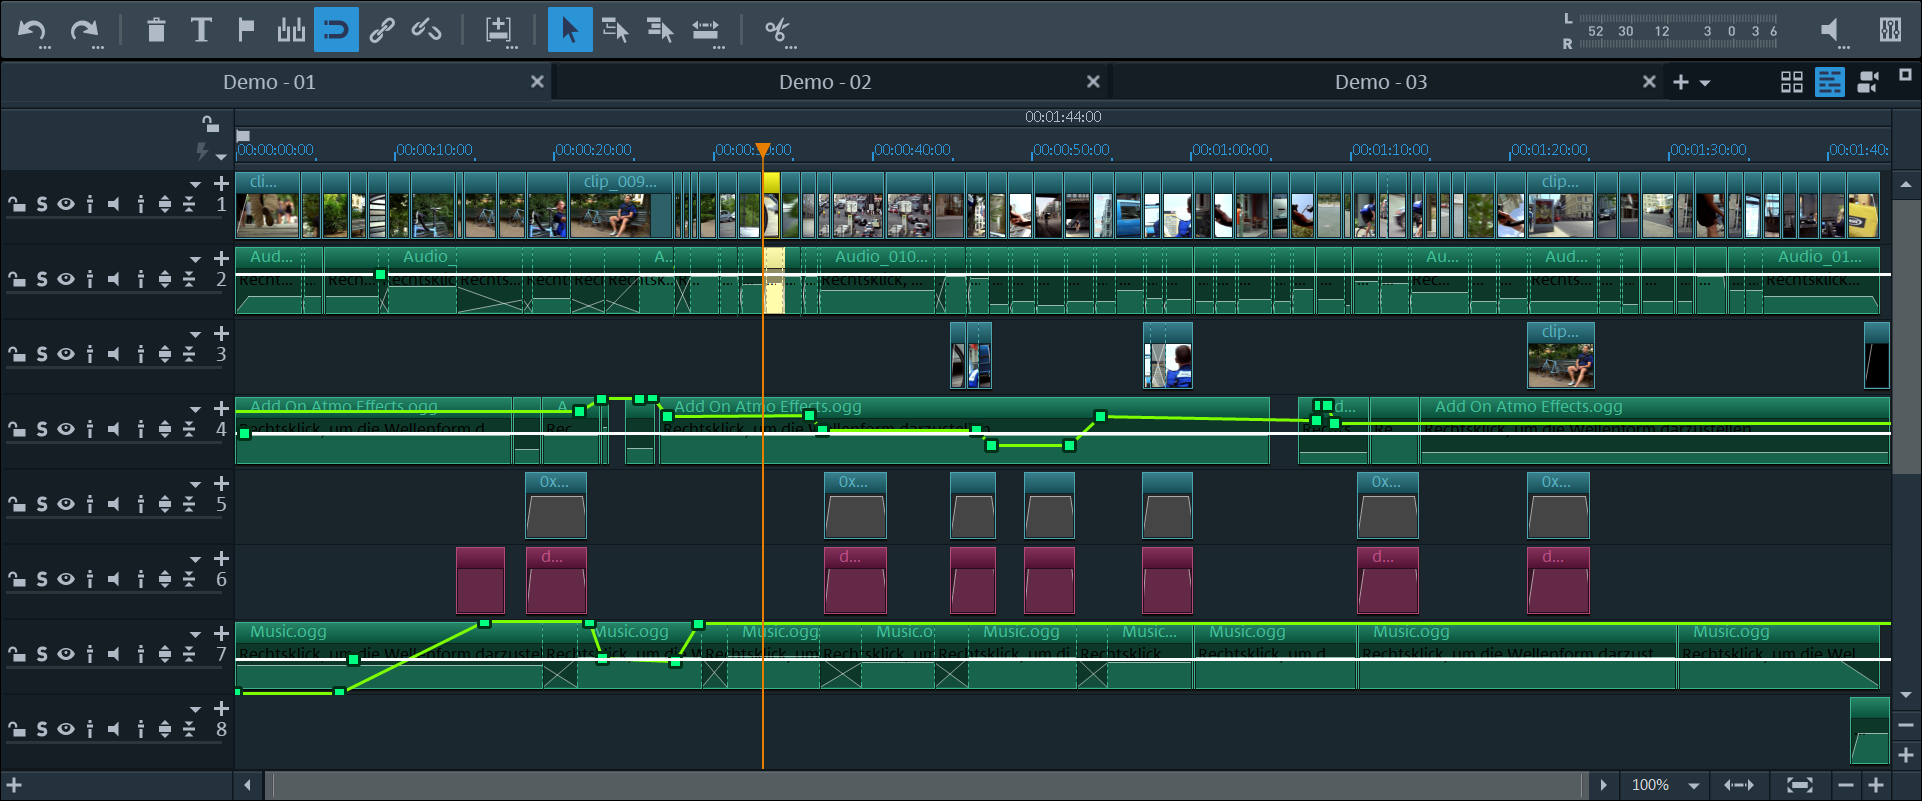
Timeline mode in Video Pro X enables you to edit videos in a detailed and precise way. You can arrange and edit your media files, effects, transitions and other elements on a horizontal timeline, making them easier to view. This mode is specifically designed for cutting videos and it gives you full control over the flow and design of your project.
Playback range:

FIGURE Timeline with range marker
Clicking in the range bar above the first track lets you define start markers, i.e. the starting point of the playback range. If you right-click, the end marker will appear to indicate the end point of the playback range. The length of the playback area is shown in the center of the section display.
- When the end marker has been reached, the playback cursor jumps back to the start marker and begins playing everything again as a loop.
- The entire playback range can be moved using the mouse by clicking on the bar in the middle while holding down the Ctrl key and dragging it. The in and out-points can be moved with the mouse. Left-clicking positions the in-point, and the right mouse button sets the out-point.
The project window playback range above the first track is linked to the playback range of the program monitor. They cannot be changed independent of each other. - To move the start and end markers to the beginning or the end of the film again, click Optimize movie view in the Window menu.
Tracks
The project window is divided into tracks where the multimedia material can be positioned and edited. The number of tracks that are displayed can be specified in the file menu under "Movie settings".
In principle, any object type can be placed on any of the tracks. Video and image objects can also be combined with audio objects within a track. The maximum length of a movie is restricted to six hours.

|
|
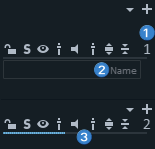
Lock icon: Clicking on this icon locks the entire track and all of its objects against editing. |
|
|
Solo: This switches the track to "solo" mode. During playback, only this track will be seen or heard. |
|
|
Hide video, image and title objects: Makes all visible objects transparent. Audio objects can still be heard. |
|
|
Transparency controller: Here you can set the transparency for the entire track. |
|
|
Mute: Mutes all audio objects on the track. Video, image and title objects are still played back. |
|
|
Volume control: Sets the volume for all audio objects on the track. |
|
|
Maximize/minimize track: Makes the track larger/smaller. This creates more space on the screen, making it easier to edit details. |
|
1 |
Track number All tracks have a number to help you differentiate between them in a project. |
|
2 |
Track name This is the name of the track. To change the name, enlarge the track first. Double-click in the name field and enter a name. Press Enter to confirm the name. |
| 3 |
Peak meter display In Video Pro X, the peak meter display is a visual tool that displays the audio levels for an audio track, with each bar showing the current level value. |
|
|
Track options
|
|
|
Add track: Click the plus icon to add a new track above the current track. |
NOTE You can define a destination track for importing the objects. Click on the track header to select a track. All objects you import will now be inserted into the selected track. Clicking again on the selected destination track disables this function.
Snap
The project window features a frame-exact grid. This ensures that video and image objects snap exactly to the borders of a frame.

The step size depends on the frame rate specified in the movie settings (File > Settings > Movie). Choose between Europe's conventional frame rate for PAL (25 frames per second) and America's and Japan's conventional frame rate NTSC (29.97 frames per second) or any other manually set frame rate.
When moving an object, the position display indicates at which frame the first image of the object is shown.

FIGURE The position is displayed in the form of a tooltip when moving the object. This information is displayed in the form "Hours:Minutes:Seconds:Frame".
In addition to the constantly active frame grid, an object grid can also be activated. This ensures that two consecutive objects will seamlessly snap together even if they are on different tracks. This avoids unwanted gaps or overlaps.
 The object grid can be activated/deactivated using the magnet icon in the lower toolbar.
Zooming

The vertical zoom function sets the number of visible tracks. On many tracks zooming is useful for selectively editing a track or an object in full view.
Use the horizontal zoom functions to set up the visible section of the project on the timeline. Clicking and dragging on the bottom border of a track header allows you to adjust the height of the display.
 Object zoom: Vertical and horizontal zoom stages are enlarged so that all of the selected objects are displayed at maximum size.
 Optimize view: Displays the full movie. Zoom will be set to 100%.
When the function is turned off, the zoom level reverts to its previous value.
Locking and preview rendering

|
You can use the lock button to prevent markers from being moved accidentally. You can reach the preview rendering features by pressing the lightning bolt button next to the timeline. |

