Program and source monitor
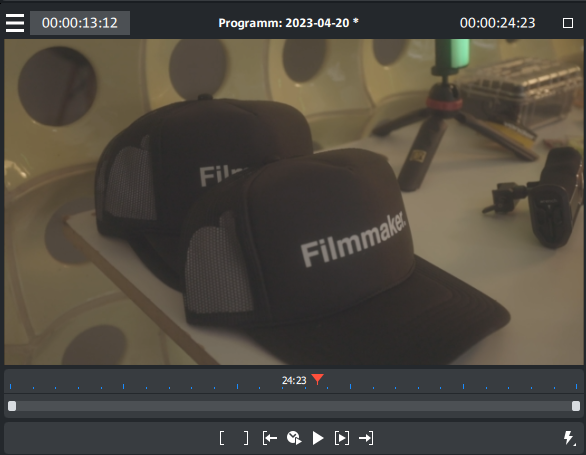
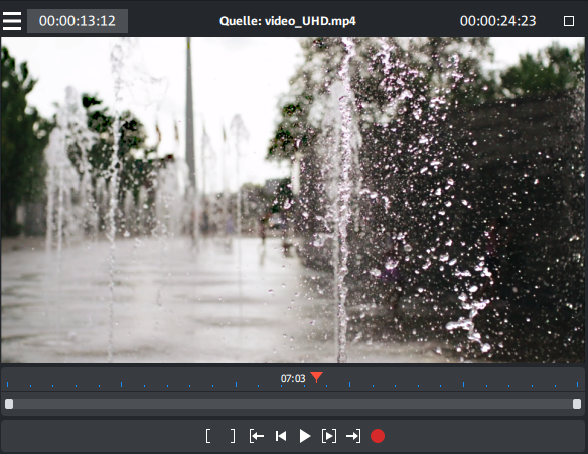
Video Pro X has two preview monitors:
|
The program monitor is responsible for objects in the project window
|
The source monitor displays a preview of files in the Media Pool and the project folder
|

|

|
Setting up the preview monitor
Program and source monitors can be set up in various ways.
Resize
The size of each monitor can be adjusted.
This can be done by clicking the screen with the right mouse button and selecting the desired size from the context menu, either from the presets submenu or user-defined (Other resolution).
Full-page view of image
The option Video monitor fullscreen in the context menu maximizes the monitors. Alternatively, simply double-click on one of either monitors.
You can also shift the monitors in fullscreen mode and access the context menu (right mouse button). There, you can also hide and display the transport control, apart from the regular entries.
NOTE Using the option Edit video effects in the context menu, you can display the effect settings of the Media Pool and perform editing on the effects directly in fullscreen.
Esc returns you to the normal view (or click on smaller button to the right in the fullscreen mode).
Monitor zoom
The preview images of both monitors may be zoomed in and out to examine specific details in the image more closely (zoom in) or to reduce the image.
Click on the program monitor and zoom out of the video image by holding down Ctrl and using mouse wheel.
You can click the mouse on a specific point in order to zoom in on it. In zoom mode, you can use the tracker to make even more precise adjustments. This makes it much easier to work on fine details and adjust animations precisely.
Repositioning
Every monitor can be positioned freely.
To do this, click on the top bar of the monitor window and drag it with the mouse button held down to the position you want.
Transport controls
Both transport controls allow you to play back video material.
Top left, you will find the video monitor menu with additional faders such as the jog wheel.
| Range
|
Above the playback functions you can select the range between the in and out points using the mouse. |
| Playback markers
|
This marker indicates the position of the image currently displayed by the program monitor. |
| Set in/out points
|
Defines the start and end of the playback range. |
|
To range start
|
This button sets the playback marker to the start of the current range for control purposes. |
| Playback around frame | A short area around the position of the playback marker will be played. |
|
Jump to movie start
|
Sets the playback marker to the start of the movie. |
|
Playback/stop (pause)
|
The playback button in the middle starts playback. A second click stops playback. TIP In the menu File > Settings > Program > Playback, you can set whether the playback marker will go back to the start position (stop) after the second click or following the appropriate shortcut (space bar), or if it should stay at the current position (pause function). |
|
Range playback
|
This button plays the current range. |
|
To range end
|
This button sets the playback marker to the end of the current range. |
|
Audio or video recording
|
Quickly jumps to recording selection. |
|
Jog wheel
|
Using this wheel, you can move by single frames within the video and zoom in for precise positioning of the playback marker. |
|
Shuttle control
|
The further the slider control is moved to the side, the quicker the arrangement is played in the corresponding direction. This way a specific position can be reached quickly. NOTE Jog wheel and shuttle control are hidden by default. Use the menu of the program monitor to set them to display. |
|
Preview quality
|
Activate smooth playback if playback becomes choppy. |
Preview Quality
You can enable a smoother preview if playback performance is poor. This setting does not have any effect on the quality of video files when exporting or burning to DVD.
Poor playback performance can be caused by the following:
- Under-performing hardware
- High-resolution source material (4K)
- A very complex project
Right-click in the transport console on the  symbol to open the context menu.
The following options are then available:
- Reduce resolution
- Reduce frame rate: Reduces the number of frames per second.
- Deactivate effects: All effects and plug-ins will be activated/deactivated.
- Using proxy objects (see Using proxy files, proxy editing)
NOTE "Reduce resolution" and "Reduce frame rate" are preset.
Movie overview
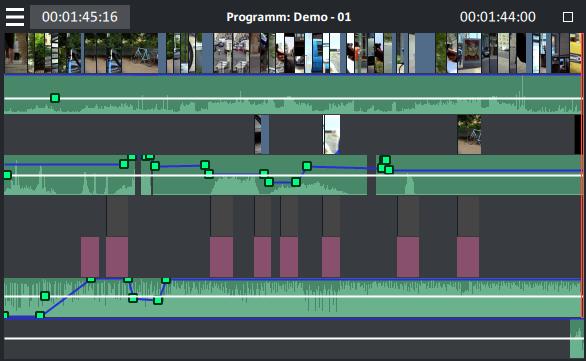
The option Movie overview in the Window menu provides an overview of the entire project. All objects in the project window are displayed in the program monitor. The overview display is especially recommended for working on long movies because the reduced overview in the program monitor can be combined well with the zoomed detailed view in the project window.

The movie overview can be used for moving around in the movie and editing specific parts:
Drag out a frame in the program monitor to zoom into the corresponding area in the project window.
NOTE If you use this function often, you can use the following keyboard shortcut for quick switching: Shift + A.


