Using Storyboards
VEGAS Pro enables you to quickly sequence your video in a lean, efficient storyboard workflow.
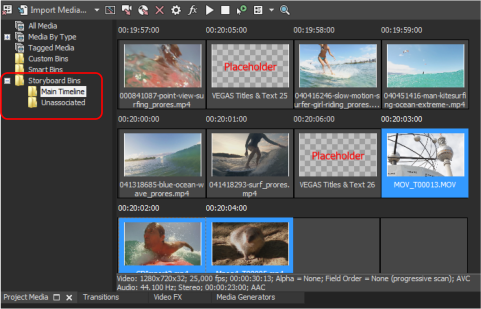
Storyboards are listed as a bins type in the Project Media window. Each project has at least one storyboard, the Main Timeline storyboard. The Main Timeline storyboard interacts directly with the main project timeline so that anything you do in one is reflected in the other.
Adding media to a storyboard
There are two general ways to add media to a storyboard:
-
Add media directly to your timeline. This also automatically adds that media to the Main Timeline storyboard and the timeline always matches the Main Timeline storyboard.
-
Add media directly to the storyboard:
-
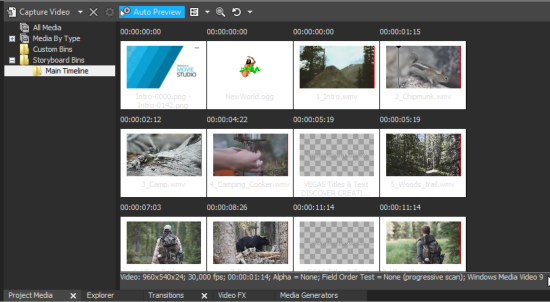
Navigate to the storyboard you want to work with in the Project Media tree view
-
Drag files from the Explorer Window and drop them into the storyboard cells:
Drop a file onto an empty cell to place the file there.
If you leave empty cells between the previous full cell and the one you are dropping the new file on, VEGAS Pro fills those empty cells with placeholder text files.
You can change the name of these placeholder files to leave yourself note about what you eventually want to put there.
You can drop a new file between two existing storyboard files to insert that file between the two existing ones.
You can drop a new file directly on top of an existing file in the storyboard to replace the existing file with the new one
-
You can also drag files from the Project Media window All Media (or any other bin) into a storyboard:
-
Drag the file from All Media and hover over the storyboard heading. After a moment, the Storyboard Bins heading expands to show you all of your storyboards.
-
Hover over the storyboard you want to add the file to. After a moment that storyboard opens.
-
Drop the file into the storyboard. This moves the file from any custom bin or storyboard into this storyboard. In order to copy the file from one bin or storyboard to the new storyboard so that it appears in both bins, hold the Ctrl key as you follow these steps.
-
-
Synchronization between the Timeline and the Main Timeline Storyboard
When you perform an edit on the timeline, the Main Timeline storyboard does not reflect the state of the timeline any more, it is not synchronized any more. You can see this by the colored background of the storyboard.
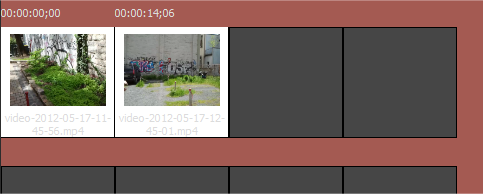
To synchronize the Main Timeline storyboard with the timeline, click the Refresh storyboard button  . Click on the down arrow near this button to switch to Automatically synchronize Main Timeline storyboard. Now the storyboard is synchronized automatically after each edit on the timeline.
NOTE Note that this will affect the responsiveness of the program when performing complex edits.
IMPORTANT While the storyboard is out of sync with the timeline, VEGAS Pro will not allow modifications of the storyboard until it is refreshed and will prompt you with the option to refresh.
Changes in the main timeline storyboard are always reflected on the timeline so there's no need for a synchronization in this direction.
Moving items around in the storyboard (organizing the storyboard)
Once files are placed in your storyboard, you can arrange them however you want. To move a file from one storyboard cell to another, hold the Alt key, drag the thumbnail to the new location, and release the mouse button to drop the thumbnail into the new position. The existing event in that spot and all following moves to the right to make room, the clips that follow the moved clip move to the left to close the gap.

NOTE The Alt key is necessary because simply dragging a thumbnail sets a selection on the media (see Project Media Hover Scrubbing for details)
Previewing a storyboard
Once you have files in your storyboard, you can preview the storyboard to quickly review your edits so far:
-
To preview a single file from the storyboard, select the file and click the Project Media window Start Preview button
 .
. -
To preview more than one file, select the files you want to view (use the Ctrl or Shift keys to select multiple files) and click the Start Preview button. This previews only the selected files one after the other in the order in which they appear in the storyboard.
-
To preview all files in the storyboard sequentially, either select all of them, or deselect all of them and then click the Start Preview button. If all files or no files are selected, this will preview then entire storyboard from start to finish.
Creating a new storyboard
While each project has a Main Timeline storyboard by default, you can add as many new storyboards as you want. This enables you to experiment with alternate sequences for your project. To create a new storyboard, right-click the Storyboard Bins heading in the Project Media tree list and choose Create New Bin from the context menu.
Additional storyboards are not associated with the main timeline and changes you make to them will not be reflected on the main timeline, nor will changes to the main timeline have any affect on unassociated storyboards.
Adding a storyboard to the timeline
Changes made to the Main Timeline storyboard are automatically reflected in the main timeline, so you don't need to do anything special to add the Main Timeline storyboard to the timeline.
If you want to add the contents of an unassociated storyboard to your main timeline:
-
Drag one or more files from the storyboard to the main timeline
-
Drag the Storyboard bin to the timeline to add all files in the storyboard to the timeline
NOTE When you drag files from an unassociated storyboard to the timeline, the Main Timeline storyboard is updated to reflect the changes made to the timeline