Creating masks using the Pan/Crop tool
The Pan/Crop tool allows you to create masks that define which parts of a video event are visible or affected by video effects. You can use Bézier curves or shape tools to isolate areas of the frame, apply feathering, and combine multiple masks for complex results.
-
Blur a face or object by combining a mask with the Pixelate effect.
-
Highlight or isolate areas of a frame while dimming or removing the background.
-
Create custom transparency and visibility areas based on animated masks.
Create a Bézier mask
- Select the video event and open the Pan/Crop window.
- Enable the Mask checkbox in the keyframe controller.
- In the left panel, expand the Path section and use the Anchor Creation Tool to define a shape.
- Click to create anchor points and close the path to complete the shape.
- For next steps on how to apply an effect to the masked area, see Creating masks using the Pan/Crop tool.

FIGURE Bézier mask drawn in the Pan/Crop window
Create a rectangular or oval mask
- Click the Rectangle Mask or Oval Mask tool on the left side of the Pan/Crop window.
- Click and drag on the workspace to draw the mask.
- Use keyboard modifiers while dragging:
- Shift: Constrain to square or circle
- Ctrl: Draw from center
- Alt: Create half-oval or rounded corners
- For next steps on how to apply an effect to the masked area, see Creating masks using the Pan/Crop tool.
Apply a mask to effects
- In the Pan/Crop window, go to the Path section and choose Positive or Negative from the Mode dropdown.
- Click the fx+ button (Plug-in Chain) to open the Video Event FX window and add a video effect.
- In the Mask section, set Apply to FX to Yes to restrict the effect to the masked area. NOTE
When Apply to FX is set to No, the mask affects the visible frame, not the applied effect.
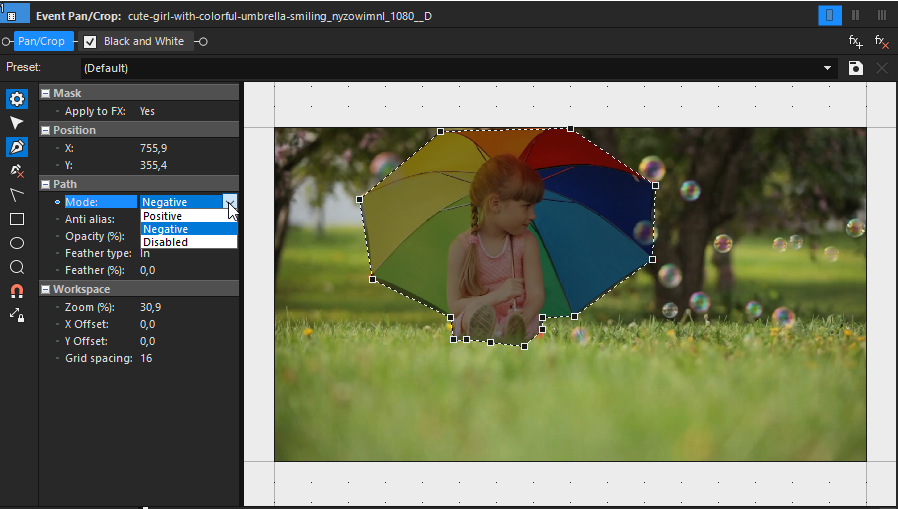
FIGURE Mask settings in Pan/Crop
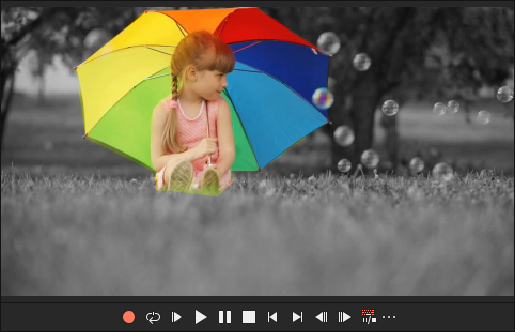
FIGURE Masked effect in Video Preview
Blur a face using a mask
- Open the Pan/Crop window for the video event.
- Enable the Mask checkbox.
- Select the Oval Mask tool and draw a mask over the face.
- Apply the Pixelate video effect to the event.
- In the Mask section, enable Apply to FX.
- Adjust the mask position and feathering to refine the result.
![]()
FIGURE Blurred face created by applying a mask with a pixelate effect
Edit a mask
- Double-click the mask in the Pan/Crop window to edit it.
- Drag the mask to reposition it or use handles to scale or rotate.
- Use the toolbar icons near the mask for quick edits:
- Positive / Negative – Define the visible area direction.
- Feather Inside / Outside / Both – Soften the mask edge.
TIP You can also choose Positive or Negative from the Mode drop-down list in the Path section on the left side of the Pan/Crop window.
- Use the context menu to manage the mask:
- Reset Mask – Resets the current mask to its default shape.
- Select / Deselect – Toggles selection status.
- Delete – Removes the mask.
- Initialize / Hide / Split Tangents – Adjust Bézier handle behavior.
- Flip Horizontal / Vertical – Mirrors the shape.
- Duplicate – Creates a copy (or use Ctrl + drag).
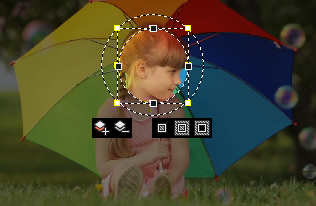
FIGURE Mask editing options in the Pan/Crop window
Further information
Last modified on December 08, 2025