Applying switches to events
Event switches determine the behavior of events on the timeline.
From the Edit menu, choose Switches and choose a command from the submenu to toggle event switches on or off.
NOTE You can also adjust event switches in the Event Properties dialog.  For more information, see Editing event properties
-
Select the event(s).
For more information, see Creating selections and positioning the cursor -
From the Edit menu, choose Switches (or right-click an event and choose Switches from the shortcut menu).
-
Select the type of switch you want to apply to the event:
Switch
Description
Excludes the selected event from playback.
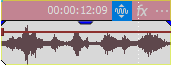
Muted events are darkened on the timeline to indicate their muted state. In the following example, the middle events are muted:

Locks an event so that it cannot be moved or edited.
TIP Click the Lock button
 on the editing toolbar to quickly lock and unlock a selected event on the timeline.
Enabling the Loop switch on an event will allow you to drag the right edge of the event out and have it repeat the file over and over rather than inserting silence.
Trim Events to include all frames
This event switch enables you to automatically adjust the length of a timeline clip event so that it includes all of the frames of the media that the event holds. This comes in particularly handy when you’ve changed the playback rate of an event either through the Playback Rate event property or with a velocity envelope on the event.
After activating this switch, add a velocity envelope and experiment with the speed settings. After you change the velocity, the event automatically trims so that it is long enough to show all frames of the media.
Alternatively, you can set the switch in the event properties dialog box. Right-click an event and choose Properties from the menu.
If you also decided to change the playback rate in the dialog box, the event's length automatically adjusts as necessary to contain all of the media’s frames.
NOTE Selecting this switch makes it impossible to trim the length of an event by adjusting an event edge. If you need to trim the event, disable the switch.
Invert Phase (audio only)
Reverses the phase of the sound data. Although inverting data does not make an audible difference in a single file, it can prevent phase cancellation when mixing or crossfading audio signals.
Maximizes an audio event’s volume without clipping.
If you want to recalculate the normalization value for the selected event, click the Recalculate button on the Event Properties dialog to determine the normalization value for the selected event. If you trim or extend a normalized event, you will want to recalculate the normalization to account for the different audio levels that may have been exposed.
Use the Normalize button in the More menu of an event for easier access. The button also provides a visual cue that you can use to instantly determine whether or not the Normalize switch has been engaged on any event.
Prevents aspect ratio distortion (stretching of video frames) when the length-to-width ratio between the source media and project's frame size are not the same.
Reduce Interlace Flicker (video only)
This switch can be useful in cases where the source material didn't originate as video and contains extremely high spatial or temporal frequencies.
When you watch the rendered (interlaced) output on video of this sort of media, you may see flickering or crawling edges if this switch is not applied
Enable this switch when using imported images that were not created using a video camera (such as photographs) or when using generated media or text.
For more information, see Adding generated media to your project and Creating text and titlesResample Mode (video only)
VEGAS Pro resampling offers choices for how to treat footage whose framerate differs from the project framerate as well as how to handle resampling during slow-motion sequences that you create with the Velocity envelope or Playback Rate setting.
With resampling, the intervening frames are interpolated from the source frames, much like a crossfade effect between the original frames. This may solve some interlacing problems and other jittery output problems.
Use project settings Uses the option that you chose previously in the File Properties dialog box
NOTE Use project settings is the default for all video events, so if you use the default switch along with the default project setting discussed above, no resampling will occur.
Frame blend Analyzes the existing frames before and after the new one and blends them to create new frames as needed Optical Flow Uses optical flow technology to create new frames as needed Disable resampling Performs no resampling NOTEThe event resample setting will override the project Resample mode setting.
This way you can leave resampling set to disabled for the bulk of your project, but switch it to Optical flow for an individual slow-motion event in your timeline.
For more information, see Setting project propertiesTIP If you have created slow motion with a Velocity envelope, you might want to choose Optical Flow from the list to see if it gives you smoother results. Optical Flow won’t work well in all cases, but can produce excellent results many times. If you aren’t happy with the results of Optical Flow, choose Frame Blend from the menu to see if you like those results any better. When you create slow motion though a change in the event’s playback rate, you can again experiment with the resampling mode that yields the best results. For instance, hold the Ctrl key and trim the right edge of your video event to the right. This lowers the event’s playback rate as indicated by the saw-toothed line running through the event.