Upload and share files (beta)
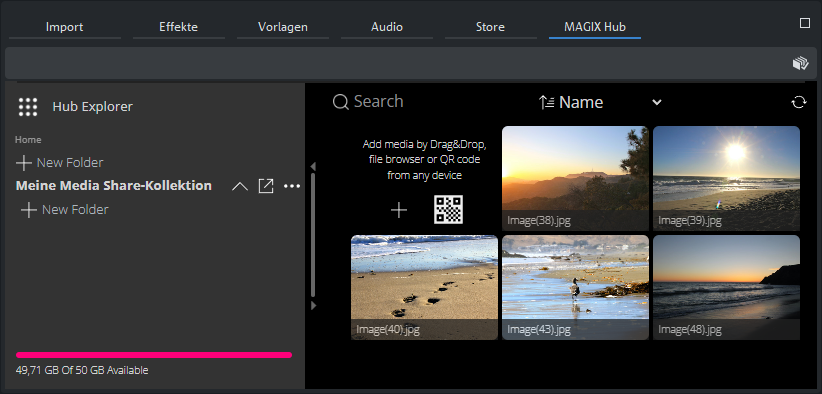
Media Share in the Hub Explorer
In Hub Explorer, you can easily upload your media to the cloud, whether from your computer or a mobile device. Organize your files in folders and share them with other participants. Invite people to view your files or upload files themselves to use them in your projects.
-
Collect media across platforms:
Invite contributors to upload media files directly to your cloud.
-
Collaborative editing:
Share media files for collaborative editing or review.
Create folder
-
In the Media Pool, click on MAGIX Hub | Hub Explorer.
-
Click on + New folder and enter a name.
Delete folder
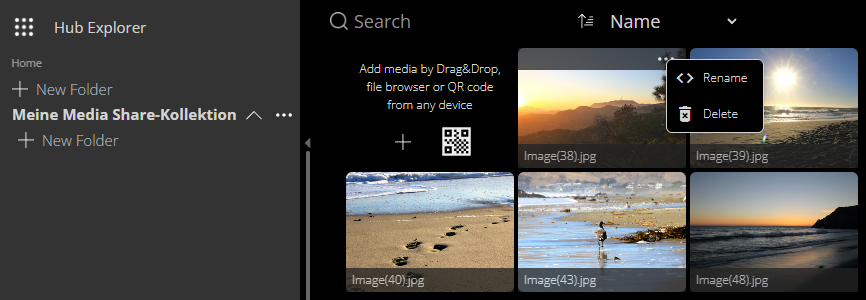
In the Hub Explorer, click on the button with the three dots | Delete.
Uploading files
You can upload files from your computer or other device to your Hub Cloud.

First, click on the folder in the Hub Explorer.
Uploading files from your computer
-
Move the desired files using drag and drop from your Windows Explorer folder into the HUB Explorer area.
-
Click on the + button and select the media in the Open dialog. Click Open.
- or -
Uploading files from mobile devices
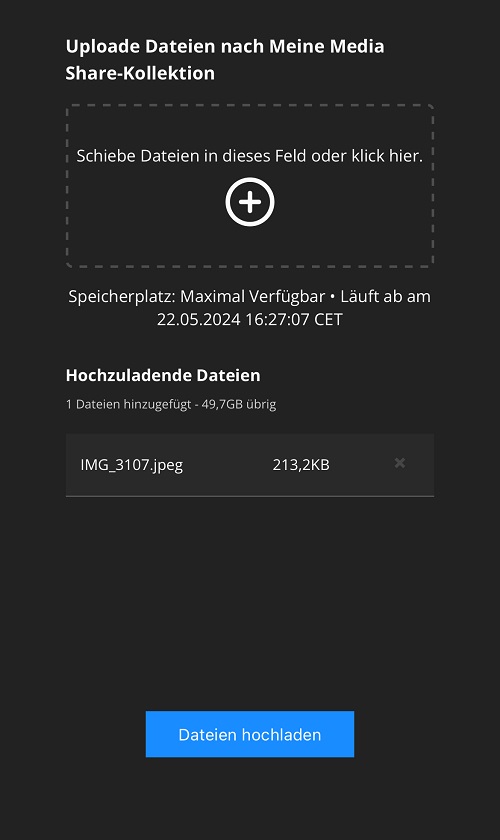
FIGURE Mobile device view
-
In the Hub Explorer, click on the folder's QR code to enlarge it.
-
Open the camera app on your mobile device and scan the QR code.
-
Follow the instructions on your mobile device to go to the URL supplied by the QR code.
This opens your device's Internet browser and points to a page that enables you to add files to your upload queue.
- Select the files you want to import.
-
Tap Upload files on your mobile device.
-
Click on Refresh
 in the Hub Explorer to view the uploaded files in the folder.
Add collaborators
In the Hub Explorer, click on  Share. A separate window opens.
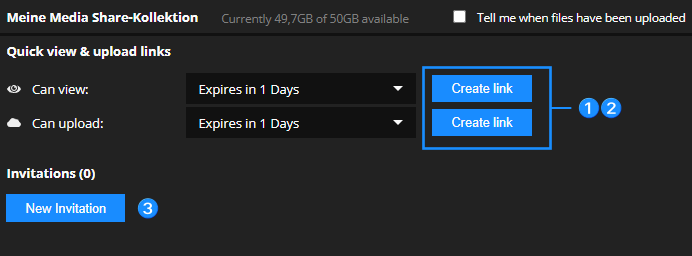
There are three methods to add participants, which can be configured either to download and view media only or to upload media.
1 Create and copy link

-
Select Quick view & upload links in this section, to configure if your collaborators should only be allowed to view and download documents or also be allowed to upload files.
-
Specify the time period for which the link will be valid from the drop-down list.
-
Click the Create link button.
-
Click the Copy icon to copy the link onto your clipboard for sharing with your collaborators.
2 Create a link and scan a QR code

-
Select Quick view & upload links in this section, to configure if your collaborators should only be allowed to view and download documents or also be allowed to upload files.
-
Specify the time period for which the link will be valid from the drop-down list.
-
Click the Create link button.
-
Click on the QR code icon to display a QR code, which can be scanned using a mobile device.
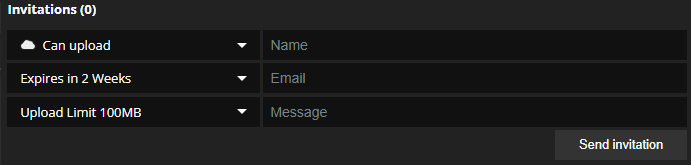
3 Send an invitations per email
-
In the Invitations section, click on the New invitation button.
-
In the top drop-down list, select whether your collaborators can only view and download, or be allowed to upload, as well.
-
In the lower drop-down list, specify the time period for which the link should be valid.
-
Enter name and mail address of the participant you want to invite to your Media Share session.
NOTE The user you invite does not need to have access to your own Hub account or be a Video deluxe user.
-
Click on the Send invitation button.
Video deluxe automatically sends an email message to the address you entered. That email message includes a link to your shared media. Once the collaborator follows that link, they will have the opportunity to view and upload files.
You can add as many collaborators as you would like.
Activate notifications
If you want to receive an automatically generated email once the files have been uploaded:
Select the Tell me when files have been uploaded checkbox.
Remove a participant
Click the cross button in the dialog.

Use Cloud media
Once you or your collaborators have uploaded files, those files are automatically added to your Media Share file.
In the Hub Explorer, click on Refresh to update the interface and display the die newly added files.
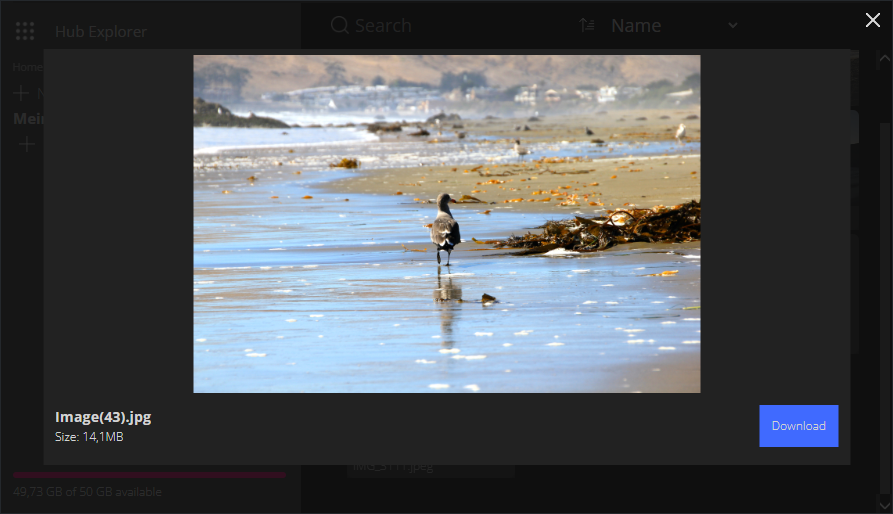
Download Files
Before you will be able to use the files, you must first download and save them locally on your computer.
In the Hub Explorer folder, click on the desired preview image | Download. This file will be saved in your MAGIX Hub Download folder.
Using files in a project
-
In Media Pool | Import, open the MAGIX Hub file.
-
Import the media into the project window.
 Further information: See Insert media.
Delete files
-
Open the Media Share folder in the Hub Explorer, in which the image/video is located and place your mouse on it.
-
Click on the upper margin of the preview image with the three dots | Delete.
Last time changed: October 27, 2025