Animate objects using keyframes
Use keyframes to animate and adjust precise movements, effects and other properties for objects.
A keyframe is a single frame in an animation that serves as an essential reference point (start or end point). Various keyframes are set when an animation is created to define movements and changes during the animation process. Intermediate values for the frames are calculated by interpolating the settings. This creates smooth transitions between keyframes. If you want to add further effects or make other changes, you can add more keyframes to create complex animations. Object properties are set for each keyframe. These properties include:
- Position: Changes the position of the object in the frame.
- Size: Changes the size of the object in the frame.
- Rotation: Rotates the object in the frame.
- Transparency: Changes the transparency of the object in the frame.
- Color: Changes the color of the object in the frame.
- Audio volume: Adjusts the volume of the audio clip in the frame.
- Effects: Changes the effects that are applied to the object.
- Masks: Adjusts the mask applied to the object.
- Speed: Adjusts the speed at which the object is moved in the frame.
- Text: Changes text content and effects in the frame.
Preparing animations
-
First, select the object in the project window to animate.
NOTE For more complex animations, it can be helpful to set project markers beforehand for orientation. Markers
-
In the Media Pool, click on Effects > View/Animation.
Here you can find all the effects that can be used to animate the object.
-
Set up the effect as it should be at the beginning of the animation.
-
 Use this button at the bottom of the Media Pool to display the effects overview. You can see here which animated effects are currently applied to the selected object. Keyframes can be placed, selected, moved and deleted.
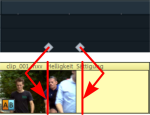
The effects overview includes two dashed lines for orientation. These lines will help you recognize the start or end of the transition.

Place keyframe
Click the timeline to set the playback marker at the locations where a keyframe should be added.
NOTE You can also use the timeline in the project window for exact positioning. Using project markers is recommended in this case. Markers
 This button places keyframes for all parameters required in the animation.
-
Additional keyframes may be added simply by placing the playback marker at the next keyframe location and changing the effects parameters directly.
The positioned keyframes may also be retroactively moved via drag and drop.
Copy keyframe
 Select the keyframes to be copied by clicking them and then press the "Copy" button.
 Next, set the playback marker at the location for insertion and click the "Insert" button.
Delete keyframe
 Select the keyframe to be deleted by clicking it.
 This button removes the selected keyframe.
Example: Making objects fly through the image
The effect "Position/Size/Rotation" can be used to animate objects or titles appear to fly across the screen. In this case we recommending placing the start and end point of the animation outside of the image.
You will need a video object and a second object to be animated, for example a title that you want to fly through the video. Here's how to do it:
-
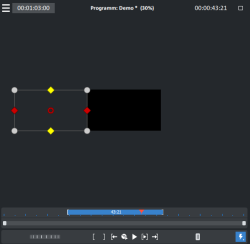
Click on the program monitor and zoom out of the video image (Ctrl + mouse wheel). This displays the workspace at the edges of the reduced preview image.
-
Select the effect "Position/Size".
-
Move the object to be animated to the position on the workspace where the animation should start. For example, to the left of the preview window.

-
Position the playback marker at the location where the animation should start.
-
Create a keyframe for the animation start.
-
Position the playback marker at the position where the object to be animated should disappear from the image.
-
Move the object to the position on the workspace where the animation should end; for example, to the right of the preview image. This will place a second keyframe for the end of the animation automatically.
-
Play back the result. The object to be animated should now fly from left to right through the video picture.
Display keyframes of individual parameters
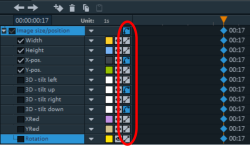
Effects can include several parameters. When you create a keyframe, it is assigned to all parameters of an effect. However, the keyframes of the individual parameters can also be controlled individually via the effects overview.
-
Click the small arrow beside the name of the animated effect to display all of its parameters.

-
All keyframes of the effects parameter can be individually moved, deleted, activated, and deactivated.

NOTE Only the parameters that are used for the animation are listed. If another parameter is required for editing the effect, it will also become visible here.
Retroactively editing an effect's keyframes
Previously set keyframes can be retroactively and temporally moved and their parameters can edited.
-
Keyframes can be moved using drag and drop. Simply click on the keyframe to be moved and drag it to the desired position.
-
To change an effects setting for an already positioned keyframe, click the keyframe and adjust the effect in the Media Pool.
Keyframe interpolation
Keyframe interpolation refers to the process of how the transition is made from one keyframe to the next. This can either be constant ("linear") or flattened ("Bezier"). The interpolation type for each animated effect can be set using the interpolation buttons in front of the keyframe bar.

In addition to the standardized curve progressions you can also create any kind of curve progression you like.
 Linear interpolation is the default setting. This transfers the values evenly as a straight line to the following keyframe.
 Automatic Bezier interpolation applies an approximation curve at the keyframe. This makes the movement progression softer and more natural.
 Manual Bezier interpolation enables you to set the value for each keyframe separately.
To do this, right-click on one of the keyframes in the keyframe bar. This will open a context menu with four options.

Linear (default setting): Keyframes set to "Linear" are entered and left with a constant parameter change.
Ease In: In this setting the parameter change slows down just before the keyframe. The effect curve before the keyframe is slowly flattened. The effect curve after the keyframe proceeds in a linear fashion. This setting is not suitable for the first keyframe.
Ease Out: In this setting the parameter change starts after the keyframe and becomes slowly more intense. The effect curve after the keyframe starts off flat and becomes progressively steeper. The effect curve before the keyframe proceeds in a linear fashion. This setting is not suitable for the last keyframe.
Ease In/Ease Out: This sets the options "Ease In" and "Ease Out" in combination.
NOTE Keep in mind that the settings for two consecutive keyframes always work together. This means that if you set one keyframe to "Linear" and the next one to "Ease In", the effect curve will still be slightly bent. In this case, a complete linear change of the parameter can only be achieved by setting the second keyframe to "Linear" or "Ease Out".