3D compositing
3D compositing is like track motion on steroids. With 3D compositing, you can move video tracks anywhere in space.
With 2D compositing (and in previous versions of VEGAS Pro), you can move video or images along the X or Y axes, and you can rotate video along the Z axis. With 3D compositing, you can move or rotate along the X, Y, or Z axes to create distance, depth, and perspective.
NOTE There are two basic rules to 3D compositing:
-
When you have a 2D track in the track list, 3D tracks below that track are rendered in 3D and then composited as a 2D image.
-
A 2D track at the root level (flush to the left of the track list) acts as a barrier to interaction between 3D tracks.
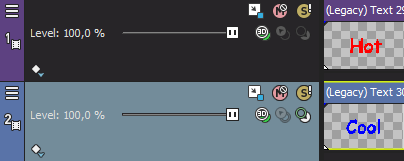
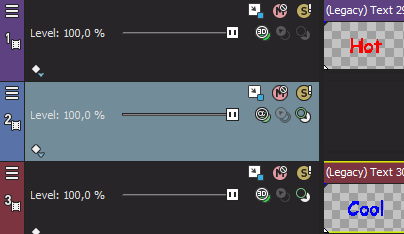
In the following examples, both text tracks have been rotated in 3D: the "hot" track is rotated toward the user, and the "cool" track is rotated away from the user.
In the first example, the two tracks intersect along their rotation axis. In the second example, adding a 2D track above the "cool" track causes it to be rotated in 3D and composited as a 2D image so the "hot" text is displayed above it without intersecting:
Tracks
Output


Moving a track in the 3D space
-
Click the Track Motion button
 on the track that contains the overlay you want to animate. The Track Motion window is displayed.
 -
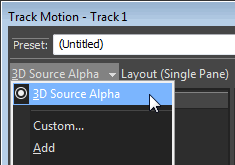
From Compositing Mode drop-down list, choose 3D Source Alpha.
-
Choose a setting from the Layout drop-down list to choose the workspace display you want to use. The Layout setting allows you to see your track from various points of view.
-
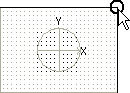
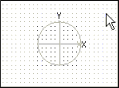
Adjust the selection area to change the viewable area of the track and its position in space. You can use the Position, Orientation, and Rotation controls on the left side of the window, or you can drag the selection box in the workspace. When you drag, guides are displayed in bold to indicate how the track will be moved or rotated:
Moving closer to or farther from viewer. Drag across corners to flip the track.
Dragging the track.
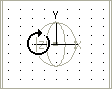
Rotating left to right around the Y axis.
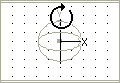
Rotating forward or backward around the X axis
Rotating around the Z axis
-
Use the buttons at the top of the dialog to allow or prevent movement or scaling. See the Change editing options heading in this topic for more information.
TIP Right-click the workspace to display a shortcut menu that displays commands to restore, center, or flip the selection box. You can also force the box to match the source media's aspect ratio or your project's output aspect ratio. Matching the output aspect ratio can prevent black bars from appearing when you use source media (such as photographs) that does not match yourproject's aspect ratio.
-
The 3D track motion occurs instantly, and the results are updated in the Video Preview window.
-
Use the keyframe controller at the bottom of the Track Motion window to establish distinct track motion settings throughout the duration of the track.
-
During playback, intermediate frames are interpolated to create smooth motion.
Expand the Keyframe interpolation heading on the left side of the window and drag the Smoothness slider to adjust the interpolation. For more information about keyframe animation, see Keyframe animation
Moving a group of composited tracks in the 3D space (applying parent motion)
-
Click the Make Compositing Child button
 on the tracks you want to group to create a compositing group.
 -
Click the Parent Composite Mode button
 on the parent track and choose 3D Source Alpha.
 -
Click the Parent Motion button
on the parent track. The Track Motion window is displayed.
Parent track motion affects the parent track and all child tracks.
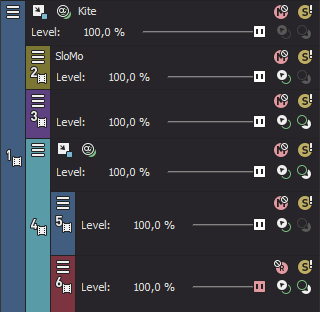
In the sample track list, parent track motion on track 1 will affect tracks 1 through 6.
Parent track motion applied to track 4 will affect only tracks 4 through 6.
-
Choose a setting from the Layout drop-down list to choose the workspace display you want to use. The Layout setting allows you to see your track from various points of view.
-
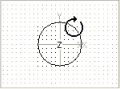
Adjust the selection area to change the viewable area of the composite group and its position in space. You can use the Position, Orientation, and Rotation controls on the left side of the window, or you can drag the selection box in the workspace. When you drag, guides are displayed in bold to indicate how the group will be moved or rotated:
Moving closer to or farther from viewer. Drag across corners to flip the track.
Dragging the track.
Rotating left to right around the Y axis.
Rotating forward or backward around the X axis.
Rotating around the Z axis.
-
Use the buttons at the top of the dialog to allow or prevent movement or scaling.
 For more information, see
Changing editing options
For more information, see
Changing editing options
TIP Right-click the workspace to display a shortcut menu that displays commands to restore, center, or flip the selection box. You can also force the box to match the source media's aspect ratio or your project's output aspect ratio. Matching the output aspect ratio can prevent black bars from appearing when you use source media (such as photographs) that does not match your project's aspect ratio.
-
The 3D track motion occurs instantly, and the results are updated in the Video Preview window.
-
Use the keyframe controller at the bottom of the Track Motion window to establish distinct motion settings throughout the duration of the tracks.
-
During playback, intermediate frames are interpolated to create smooth motion.
Expand the Keyframe interpolation heading on the left side of the window and drag the Smoothness slider to adjust the interpolation. For more information about keyframe animation,see Keyframe animation
Applying a stereoscopic 3D camera
The Stereoscopic 3D Camera controls allow you to add stereoscopic depth to 3D track compositing elements.
-
Set up your project as a stereoscopic 3D project.
For more information, see Setting up your stereoscopic 3D project -
Add 2D media to the timeline.
-
Click the Track Motion button
. The Track Motion window is displayed. -
From Compositing Mode drop-down list, choose 3D Source Alpha.
-
Click the Expand button
 next to the Stereoscopic 3D Camera heading on the left side of the Track Motion window. The Lens Separation and Depth Adjust controls are displayed.
 -
Use the Lens Separation and Depth Adjust controls to set the depth of your media:
Item
Description
Type a value in the box (or click the
 to display a slider you can drag) to set the distance between the lenses in your virtual stereoscopic 3D camera.
The setting represents a percentage of the frame width. For presentation on a 40-inch HDTV, the value typically would not exceed 7%. For theatrical projection, the value typically would not exceed 0.5%.
Type a value in the box (or click the
to display a slider you can drag) to displace the left-and right-eye images to set the depth of your 3D image. You usually want all of the action behind the screen plane, only crossing the screen plane for dramatic or special effect. However, make sure never to create divergence, where the left-eye picture would appear more than 2.5 inches to the left of the right-eye picture on the largest screen where your movie will be shown.0 represents screen depth; positive values push action behind screen depth, and negative values push action in front of screen depth.
Changing editing options
Use the toolbar at the top of the Track Motion window to change your editing options:
|
Item |
Description |
|
|---|---|---|
|
|
Enable Rotation |
Select this button if you want to be able to rotate, or spin, the video. When the button is not selected, video is locked so you can move it along the X, Y, or Z axis, but the track cannot be rotated. |
|
|
Enable Snapping to Grid |
Select this button if you want your editing to snap to the grid. |
|
|
Edit in Object Space |
Select this button if you want to edit in the object's space rather than the camera's space. For example, if a track is rotated, its X axis may not correspond to the X axis of the of the Video Preview window. Selecting the Edit in Object Space button in conjunction with the Prevent Movement buttons allows you to move the object along its own X, Y, and Z axes. |
|
|
Prevent Movement (X) |
Select this button if you want to prevent horizontal movement of the track. |
|
|
Prevent Movement (Y) |
Select this button if you want to prevent vertical movement of the track. |
|
|
Prevent Movement (Z) |
Select this button if you want to prevent movement of the track along the Z axis (closer to or farther from the viewer). |
|
|
Lock Aspect Ratio |
Select this button if you want the selection box to retain its aspect ratio during resizing. When the button is not selected, the height and width can be resized independently. |
|
|
Scale About Center |
Select this button if you want the selection box to retain its center point when you resize the box by dragging its edges. When the button is not selected, the opposite side of the selection box will remain anchored when you drag the edges to resize it. |
|
|
Prevent Scaling (X) |
Select this button if you want to lock the horizontal dimension of the selection box. |
|
|
Prevent Scaling (Y) |
Select this button if you want to lock the vertical dimension of the selection box. |
|
|
Prevent Scaling (Z) |
Select this button if you want to lock the Z-axis dimension of the selection box. |


Saving or recalling a keyframe preset
Keyframe presets save the settings of the selected keyframe row at the cursor position.
NOTE Presets for 2D and 3D track motion are saved separately: presets you create in this window will not be available in the 2D Track Motion window.
Saving a preset
-
Adjust your Position settings as desired to create a keyframe.
-
Type a name in the Preset box.
-
Click the Save Preset button
 .
.
Recalling a preset
-
Click in the keyframe controller to position the cursor where you want to apply the preset.
-
Choose a setting from the Preset drop-down list.
If no keyframe exists at the cursor position, one is created using the settings from the preset. If a keyframe exists at the cursor position, the keyframe's settings are replaced with the settings from the preset.
Deleting a preset
Click the Delete Preset button  to delete the current preset.
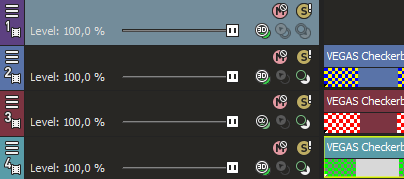
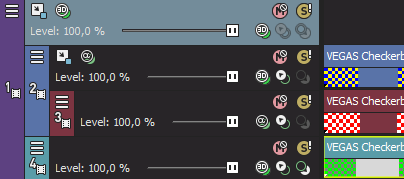
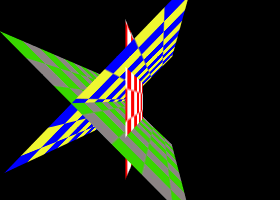
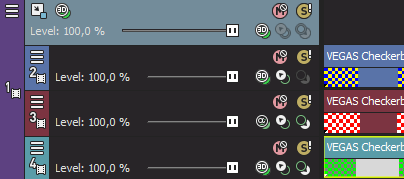
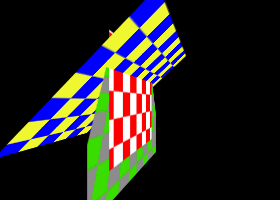
Examples of various 3D compositing scenarios
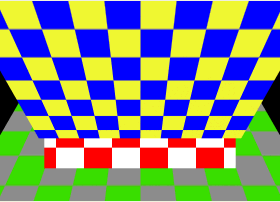
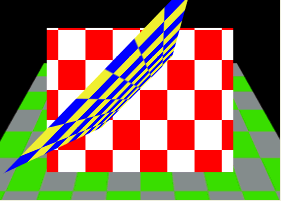
In the following examples, track two (blue-and-yellow checkerboard) is rotated forward in 3D space, track 4 (green-and-gray checkerboard) is rotated backward in 3D space, and track 3 (red-and-white checkerboard) is a 2D track.
Track 1 is used to rotate tracks 2 through 4 so you can see the compositing interaction.
In the first example, the 2D track is a compositing child to track 2. The 2d child is inserted in the composited output at a depth of zero on the Z axis, and tracks 2 and 4 intersect in 3D space.
In the next example, clicking the Make Compositing Parent button  on track 3 forces the track below (at the same compositing level) to be rendered in 3D and composited as a 2D image.
Track 4 (green-and-gray checkerboard) now has the appearance of depth—the checkerboard tapers to a vanishing point—but is inserted in the composited output as a 2D image at a depth of zero on the Z axis. Track 2 is still rotated in 3D space.
In the next example, clicking the Make Compositing Parent button on track 3 again forces the track below (at the same compositing level) to be rendered in 3D and composited as a 2D image. However, in this case, the 3D rotation that was applied as parent motion on track 1 is not applied to tracks 3 and 4.
In the next example, all tracks are compositing parents. The 3D track on track 2 is on top, the 2D track in track 3 is composited below track 2, and the 3D track in track 4 is composited below tracks 3 and 4.