Track List
The track list displays all of the audio and video tracks in your project and contains the master controls for each track. A scrub control and playback rate slider is also available below the track list.
 For more information, see Audio track controls Video track controls and Scrubbing
Track Headers
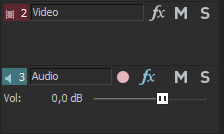
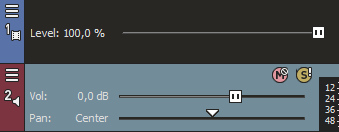
The Track Headers have been designed to be less cluttered and take up less screen realestate. You can use the More button  , located just above the track number in the track header, to quickly assess buttons that are not displayed or to select which buttons are displayed by default each time you open the program.
To access a button not currently shown in the track header, click the More button to open the menu. Select the command according to the button from the drop down list.
To add a button to the track header, click the More button to open the button selection menu. Choose Edit Visible Button Set from the drop down list. Click the checkbox of the button(s) you want to be shown in the track header and click OK.
If you want all of the buttons to show on the Track Header, click the More button to open the button selection menu, choose Edit Visible Button Set from the drop down list, click the Show All button, and click OK.
You can quickly reset the buttons displayed on the Track Header to the factory default by choosing View | Window Layouts | Default Layout (Alt+D, D).
This resets the application back to all of the factory default settings, not just the Track Header defaults.
There are times when you need to free up as much screen/track real-estate as possible. The video and audio Track Headers have been designed to accommodate that. You can go from full to minimal to very minimal and back again quickly and easily.
- Click the More button and choose Edit Visible Button Set
- Click the Hide All button and click OK
- Do the same for both audio and video tracks. You now see only the faders and pan controls
- Place the cursor on the vertical border between the track headers and the tracks. The mouse will change its shape to a line with a double-headed arrow . Click and drag to the left until all you see are the track numbers and More button. To return to the default Track Header size drag the border back to the right, or double click the border.
You don’t need to hide all the buttons for this to work. As you drag the Track Header border to the left it will automatically hide the buttons. You can always get to hidden buttons via the More button. Double-clicking the border will take you to and from full Track Header width and just the track color bars.
Time Display
The Time Display window shows the current cursor position, MTC input, MTC output, or MIDI clock output time.

Right-click the window and choose a command from the submenu to change the display format.
|
Item |
Description |
|---|---|
| Time at Cursor |
Displays the current cursor position using the current time format. |
| MIDI Timecode In |
Displays incoming MIDI timecode. |
| MIDI Timecode Out |
Displays outgoing MIDI timecode. |
| MIDI Clock Out |
Displays outgoing MIDI clock. |
| Time Format |
Choose Time Format and choose a setting from the submenu to set the time units used in the Time Display and Time Ruler. |
| Text Color |
Choose Custom to specify the color that will be used to display the text in the window. |
| Background Color |
Choose Custom to specify the color that will be used to display the background of the window. NOTE Changing the Time Display window colors affects only the current color scheme. You can change the color scheme on the Display tab of the Preferences dialog. |